Showing posts with label cold weather. Show all posts

Friday, May 23, 2014

Don't Step on the Grass...

But no, not that grass in the lawn. And, no, not that either.

You may know it as asparagus, but come mid-May around here, it's simply grass. Hadley grass, to be specific. Hadley, on the rich floodplains just across the Connecticut River and hair north of here, is world-renowned for its asparagus. Or at least it was, up until the 1970s, when a soil-borne fungus more than literally decimated Hadley's asparagus production. In the decades leading up to that, Hadley farmers would pick and prepare up to 50 tons of asparagus each day of the fleetingly brief few weeks of the season. Hadley grass reportedly turned up in chic European restaurants and even at springtime feasts held by the Queen of England.

Although local asparagus production doesn't take on the epic proportions it did forty years ago, there are still a handful of asparagus farmers in full-scale production and many backyard growers with extra to sell. The town still takes pride in this element of its history, honoring the tender green spears with a major community festival and, I kid you not, an ice cream flavor. And, as it's an ingredient where freshness is especially rewarded, it's still worth trawling the back roads in Hadley and the surrounding towns this time of year for hand-written signs that simply read "Grass." Or, if you're me, quietly coveting the asparagus in the adjacent community garden plot and settling for taking many pictures of it and then buying a bunch from the stand just up the hill.

So, why simply grass? One variant, based on a folk etymology of the word, dating back to the 17th century, was sparrowgrass. The name held on until late in the 1800s, and, according to a 1791 pronunciation dictionary, calling it "asparagus" implied "an air of stiffness and pedantry." I can't say for certain why it stuck around here, but even aside from a desire to avoid stiffness and pedantry, it was grown in sufficient volume that it was almost as common as that grass in the lawn.

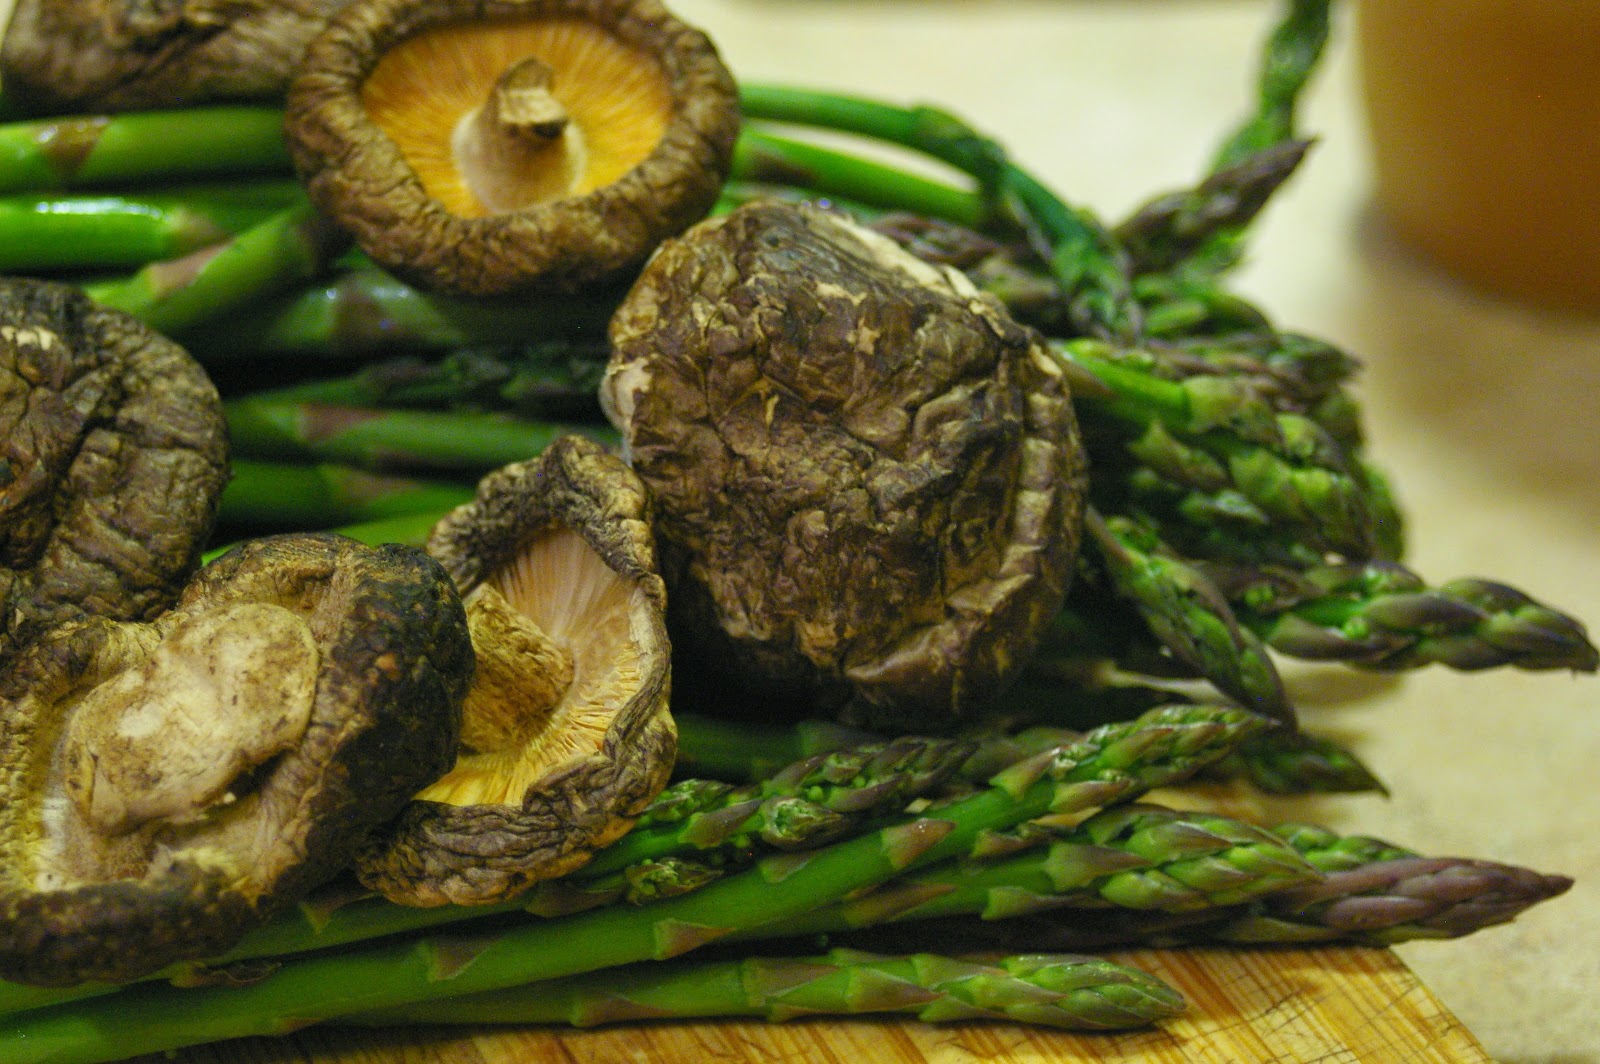
Asparagus being as versatile as it is and asparagus season being as fleeting as it is, I've been chowing through it every which way since the first local asparagus came in about two weeks ago. I was thinking of writing about asparagus and chèvre risotto or lemony shaved asparagus salad, but today's cool, rainy weather put me in a soup mood so I put together a creamy, smooth asparagus soup, accented with dried shiitake mushroom and white wine and topped with the asparagus tips, toasted with slivered garlic.

Creamy Asparagus-Mushroom Soup

gluten/grain-free, optionally vegetarian
  • 1 lb. asparagus
  • 1 onion, small dice
  • 4 cloves garlic
  • 6-8 dried shiitake mushrooms
  • 1 Tablespoon butter
  • 1 teaspoon olive oil
  • 2 teaspoons salt
  • 1¼ c. dry white wine
  • ½ c. cream
  • 2 c. chicken or veggie broth
You have two options with the dried shiitakes: you can grind them up and add them as a powder, or you can simmer them in the stock until they're soft enough to blend. If you're simmering them in stock, start that first. Break up the mushrooms coarsely with your hands and put them in a small saucepan with the broth and bring up to heat over medium-high heat. The mushrooms will need to simmer for at least 15-20 minutes to soften. If grinding them up, run them through a spice grinder until fine and set aside.

Dice onion. Melt butter with olive oil in a large saucepan over medium-low heat, then add onion, stirring occasionally. Meanwhile, peel and mince two cloves of garlic and prep the asparagus. Snap off both ends of the asparagus (this is a good job for earnest helpers of all ages and abilities). If you're running short on time, you can cut off the top and bottom inch of the spears in one fell swoop. Scrap the cut ends, but put the tips aside to put on top later. Cut the stalks into pieces about an inch long.

Once the onion has started to get clear and soft, add the garlic, salt and asparagus. Stir until the garlic gets fragrant, then add a cup of wine. If simmering mushrooms, add the mushrooms and broth, too. If using ground mushrooms, whisk with the stock and add to the pot with the asparagus. Let simmer until the asparagus is soft, 10-15 minutes, add the cream and remaining wine, then blend until smooth.

Sliver the other two cloves of garlic and saute in a little olive oil with the asparagus tips and salt and pepper. Serve soup with garlicky asparagus tips on top.

Saturday, January 19, 2013

Aloo Mattar Deconstructed (Or, one more thing to do with mashed potatoes)

I'm always interested to hear from people if they have, historically, been food separators or food mushers. Food separators are those who observe strict boundary lines between food on their plate; they may go so far as to reject those impure motes of food which may have absorbed traces of the others. Food mushers, on the other hand, tend to take a more integrative, Gestalt approach, seeing divisions between the food on your plate as totally constructed and unnecessary, swirling it all into a cohesive whole.

Kids tend to be much more hardline about their separation/mushing practice, though it is certainly not limited to young folks. Interestingly, despite any value judgment I may have implied in my descriptions, I know great cooks who grew up in each camp. It truly is interesting to see how it's an indicator of one's approach: Separators tend to take a more measured, scientific approach. They're more likely to do careful research before cooking, even if they're creating a new recipe. You want one in your kitchen the day you get that perfect first bunch of asparagus in the spring. Mushers tend to play a little more fast and loose in their recipe creation, coming up with uncanny combinations on the fly and making the most of what's at hand and reimagining ingredients. You want one in your kitchen when you have a fridge full of leftovers that need to get used up.

That said, this one goes out particularly to those other folks who ever got excited about swirling together mashed potatoes, peas and ketchup. Doubly for anyone who would add hot sauce.

Aloo Mattar is a hearty North Indian dish featuring potatoes (aloo) and peas (mattar) in a spicy, tomato-based sauce. I first made this on a cold, damp day I really wanted mashed potatoes, much more than I wanted rice or flatbread, so I pulled the recipe apart so as to put the curried peas over the potatoes. Since then, I've used the curry over mashed potatoes idea in a few other ways, but this is still my favorite. It also leaves broader possibilities for using the leftover mashed potatoes.
The dish comes together quickly (I've done it in less than 30 minutes), is vegetarian, and could easily be vegan: make whatever mashed potato recipe you like, and omit or replace the (sour) cream. You can even make your own: one of my vegan friends swears by this recipe for cashew sour cream.

Aloo Mattar, Deconstructed

vegetarian, gluten/grain-free, easily veganified
serves 4, start to finish in 30 minutes.

    Super-Basic Mashed Potatoes

  • 5 med.-large potatoes
  • 1-2 tsp. salt
  • 2 T. butter
  • 1/4 c. milk

    Masala Mattar

  • 6-7 cloves garlic, finely minced
  • 1" piece ginger, peeled and finely minced
  • 2 c. tomato puree (about ⅔ of a 28 oz. can)
  • 1 tsp. red pepper flakes
  • 1 med. onion, med. dice
  • ½ T. butter
  • ½ T. oil
  • 1 2" cinnamon stick (if you don't have it, add another tsp. of ground cinnamon later)
  • 2-3 cloves
  • 2-3 green cardamom pods
  • 1 tsp. cumin seeds
  • ½ tsp. methi (fenugreek) seeds (optional)
  • 2 tsp. turmeric
  • 1 tsp. salt
  • 1 tsp. cinnamon
  • 1 lb. (3½-4 c.) frozen peas
  • ¼-½ c. light cream or sour cream
  • fresh cilantro

  • Start with the mashed potatoes. You can use whatever mashed potato recipe you like, but this is a good basic one. It's just a base, anyway. Wash potatoes and slice into chunks about ½ to 1 inch large (you can peel them, if you prefer). Place in a large saucepan, cover with water and add about a tsp. of salt. Cover with a well-fit lid and bring to boil over high heat. Let boil until potatoes are fork-tender, then add butter, milk and salt to taste as you mash. I don't like mine perfectly smooth, and find that having some intact pieces of potato helps back this as an interpretation of aloo mattar, but it's up to you.

    I made the whole peas thing in my cast iron dutch oven, but this would also work in a large, heavy-bottomed saucepan.

    First, prep the garlic and ginger. You have two options here: you can chop them roughly, then throw them in the food processor with the tomato and red pepper or you can mince them both finely and add them at the same time as the tomato.
    Put your large, heavy-bottomed pan over a med-high heat and start toasting the whole spices: the cinnamon stick, cloves and cardamom. let them get fragrant but don't let them burn. Add the butter/oil, cumin and methi (if using) and stir/toast until the cumin seeds get sizzly and fragrant. Add the onion and let it cook for 2-4 minutes until it starts to soften. Add the turmeric, ground cinnamon, peas and tomato/garlic/ginger/chili mixture. Let simmer for 5-10 minutes, then add cream or sour cream and cilantro. Adjust salt/spicy to taste and serve over mashed potatoes.

Friday, December 21, 2012

Snappier Ginger Snaps

All my favorite winter weather dishes come from hot climates: Spicy coconut curry, robust moles. I understand the theory of spicy foods for hot climates: that it causes you to sweat which, in turn, helps you cool down. It just happens to make just as much sense in a situation where it can't heat you quite to the point of sweating. Maybe, to the point of taking off a sweater.

Why should savory foods have all the fun, though? Even sweet foods that should be spicy aren't. Consider gingerbread: if you eat fresh ginger, candied ginger, or the right kinds of ginger beer, it will, at the very least, tingle your tongue a bit. However, your average gingerbread cookie doesn't have anywhere near the bite of fresh ginger. When it comes down to it, you're simply not going to get that flavor from ground, dried ginger. So, I decided to call in reinforcements. My mom, in her baking days, let me in on her trick of using black pepper in her her gingerbread. I decided to raise the stakes to red pepper. I brought the first batch into work, and I had some folks declaring them the best gingerbread cookies they'd ever had and some running for the water fountain (I dialed down the chili powder the next time I made it).

This recipe is a variation on the the crinkle cookie - a sticky dough rolled in sugar, the sugary crust crackling as the cookie rises and spread. There are many schools of thought on thought on this type of cookie. Some recipes are built around whipped egg whites and a suspicious number start with boxed cake mix (?). Even more basic enough is the question of butter or vegetable oil. Many of the butter-based recipes (including an intriguing brown butter crinkle cookie) use it melted, so it comes down to a matter of flavor vs. convenience. You can make either of these recipes with butter instead, but increase to ¾ c. (1½ sticks).

Crinkle cookies are a great go-to when you have a burning need to make cookies - as happens - but are out of butter or don't have time to let butter soften (or if you're serving someone who can't have dairy).

Actually Spicy Ginger Crinkle Cookies

adapted from Megan Applegate's Nana's Recipe (which wasn't quite so spicy)
  • ⅔ cup vegetable oil
  • ¼ c. molasses
  • 1 egg
  • 1 cup sugar (+ 2-4 tablespoons for rolling)
  • 2 teaspoon gr. cinnamon
  • 2 teaspoon gr ginger
  • ½ tsp gr. clove
  • ¼-½ tsp. gr. chili (I used chipotle)
  • ½ teaspoon salt
  • 2 teaspoons baking soda
  • 2 cups all-purpose flour

Preheat oven to 350°
Whip oil, molasses, sugar, egg to creamy. It will still have a loose texture, but will emulsify some. Add spices and beat on low to incorporate. Add baking soda, salt, flour and mix on low to blend.

If you're patient, you can stick the dough in the fridge for an hour and it will stick to your fingers a little less. If you don't mind a little cookie dough on your hands, barrel right along. Roll into walnut-sized balls (~1" diameter), roll in granulated sugar, place on a parchment-lined sheet pan and bake at 350° for 10-13 minutes. They will seems very soft when they come out, but resist the urge to put them back in. If you bake them until they feel firm, they will be too hard and dry when they cool off. Feel free to experiment with what time/size combo works best for you, but this arrangement gets me lusciously chewy cookies.

Tuesday, November 13, 2012

This Bread Repels Hurricanes

In the days leading up to the northern landfall of Hurricane Sandy, we were put on high alert. Around here, it didn't end up exceeding a rainy day in March back home on the hill in Vermont (which still entails 40+ mph wind gusts), but given the several unprecedented qualities of the storm, particularly its size, it seemed unignorable. I suspect many locals were dragged into the memories of the storm exactly a year previous that dumped a foot of wet snow and left folks (including us) out of power for days or weeks. We prepared for this storm to make up for how we didn't prepare for that one. Perhaps, looking at those less than a hundred miles south of us who were out of power for over a week and those within 200 miles that are still suffering the effects, it was wiser to over-prepare. The governor pre-emptively declared a state of emergency and asked all schools to stay closed on Monday. So we did.

What else do you do with a day off and the thought that you could be out of power (and thus unable to cook) for a few days, but make sturdy bread? This bread starts with a multigrain porridge, adds a variety of seeds from sunflower to cumin and just enough flour to give the dough enough body to make a loaf. The loaf is dense; it lacks the well-developed gluten structure to create the large, irregular air pockets typical of artisan bread. However, this denseness also means that the bread takes a longer time to go stale, and not just because it's harder to tell. Moreover, the density of grains and seeds in a slice mean that it's also more nutritionally dense and satisfying. If you're going to be eating the same loaf of bread for a week because your stove doesn't work, this is a pretty good one to be stuck with.

We didn't end up losing power for more than two minutes during the day, but, then again, I was happy to have this bread for the week with electricity. The bread is good with just peanut butter, jam or cheese, but it's at its best toasted.

This is less of a recipe and more of a general schema; I don't know that I've ever made this exactly the same way twice. I used to make it more frequently when I used to eat multigrain porridge more regularly. Ironically, that very folksy food became less practical for daily consumption and slipped off the menu after I ditched the microwave (or, more specifically, stopped living with the roommate that had one). The combinations of grains and flours depends on what I have and what I feel like at the time. Common features are brown rice, steel-cut oats, buckwheat, barley and wheat berries. I also have a multigrain hot cereal blend with flaxseed from the bulk section at the co-op that I top things off with.

Breads containing intact or cracked whole grains typically start with a soaker. A soaker is slightly different from a hot cereal: instead of cooking the grains with water, you pour boiling water over them and let them sit for several hours or overnight. This softens the grains so that you don't end up cracking your teeth on them, but leaves their shape largely intact. It also helps activate some of the enzymes that break down the complex sugars in the grain to simpler ones, making for a more flavorful bread. Cooking the grains all the way lets you cram even more of them in, as the water in the cereal makes for most of the water of this very wet dough. By weight, this dough has more water than flour. A typical sandwich bread dough has about 60% as much water as flour by weight. A baguette has 70-75% as much water as flour. This has about 110% as much water as flour (though I'm not the first do acknowledge that breads containing whole or cracked grains make for uncannily wet baker's percentages). A well-hydrated dough also makes for a boldly crusty bread.

Like many good bread recipes, this one takes a lot of time start to finish, but very little active time. It makes it an excellent project for a rainy day, or, as it were, for a rainy and windy one.

Bonus: Get Pumped up to Bake!

The bread that French baker Vincent Talleu is making in his video is completely different from this one, but he exhibits such joy in baking that it makes a good watch to get you all pumped up to make bread of any kind.

Porridge Bread

vegan, makes two moderately-sized loaves or one very large loaf

    Soaker:

  • 4 c. cooked grain (1 c. dry grain : 3 c. water)
  • 1 Tblsp. whole cumin
  • 1 Tblsp. whole caraway
  • 1 c. nuts & seeds
  • 1 Tblsp. kosher salt
  • Sponge:

  • 1 c. water
  • 1 Tblsp. active dry yeast
  • 1 c. flour
  • The Rest:

  • approx. 6 c. mixed flours
Begin by cooking the grain. Take a cup measure and fill it with whatever whole/cracked grains you have available. In this batch, I have teff, short-grain brown rice, farro, barley and a multigrain hot cereal including flax seed. Put it in a large saucepan (at least 2 qt) and add 3 cups water. Cover and bring to a boil over high heat, then turn to low and cook for another 20 minutes or so. If you're doing this the night before, you can bring to a boil and then simply turn off the heat and ignore it until the next day. If you're doing this same day, after cooking let the grain cool enough to touch (2-4 hours, though you could speed this up by putting it in the fridge and stirring occasionally). It can be warmer than room temperature, but shouldn't feel hot, as this could kill the yeast.

When you're ready to actually make the dough, start a sponge. The sponge is the wake up call for the sleeping yeast. Put a cup of lukewarm water in a large mixing bowl (this will accommodate your whole dough later) and add in the yeast and one cup of all-purpose or bread flour. Mix with a wooden spoon until it has a smooth, consistent texture. Set aside until it starts getting bubbly, about 15-20 minutes.

Meanwhile, get out your cup measure again and fill it up with a blend of nuts and seeds. I really like sunflower and sesame seeds, but have been known to include walnut pieces or slivered almonds. You can put in less of this or none at all without it changing the recipe significantly if you have dietary restrictions or have no nuts or seeds hanging around, but it really adds a lot to the bread. Add the seeds, salt, cumin and caraway seeds to the cereal in the pot and stir together. Again, if you don't have or don't like cumin or caraway, they're not essential, but I really like them. The salt, on the other hand, is important to controlling the rise of the bread and less negotiable. I typically include the same volume of salt as yeast, but if you're worried about salt you could get away with 2 teaspoons instead of a whole tablespoon.

Add the seed/cereal mix to the sponge and stir until well-blended. Begin adding flour, a cupful at a time. This is another place where you have some flexibility. You'll add about 6 cups of flour in this stage, but what kinds are up to you. It should be at least half varieties of wheat flour (i.e., white, whole-wheat, semolina, atta/chapati flour), but for the rest of it, go crazy with whatever buckwheat, rye, spelt, etc. flour that you have. Start by adding a cup of flour and stirring in one direction with a wooden spoon until well-blended. Stirring in the same direction helps the gluten develop. Continue mixing in the bowl with a spoon until the dough starts forming a ball and wanting to stick to itself more than the bowl. Flour a clean surface and turn the dough out onto it. Flour your hands and start kneading, adding more flour as the dough incorporates the flour and sticks to the kneading surface again. When the dough starts developing a smooth, coherent surface and stops wanting to stick to everything so much (not fewer than 5 cups of flour but not more than 7), load it back into the mixing bowl to rise. You can clean and oil the bowl, but it doesn't make a huge difference. Cover with a towel and leave in a spot slightly warmer than room temperature to rise. The heavy dough will take 70-90 minutes to double in bulk.


Once the dough has risen, flour your work surface again and scrape the dough out onto it. Knead the dough a few turns to push out the air. If making two loaves, divide dough in half with a bench scraper or large knife. For each loaf, fold the dough over several times and then form into a boule (French for "ball"). This video demonstrates how to form your dough into a boule far more efficiently and effectively than I could explain it in words. Note that the baker in the video finished by placing the boule into a basket to proof. Basket proofing is essential for helping a wet dough like this one keep its shape during the final rise; otherwise you risk having a thin, flat loaf. Luckily, one does not need purpose-designed baskets for proofing (mine, pictured farther above, weren't). Any small basket that you don't mind getting a little floury can be lined with a clean sack-cloth towel (woven, not terrycloth!), floured thoroughly and used for proofing. Others have had success lining a colander or even a bowl with a floured cloth and using it for a proofing basket. Baskets and colanders have the advantage of letting the dough breathe a little more, but a bowl will do in a pinch. For more info, this discussion thread contains several people's descriptions of their improvised proofing baskets. The dough's second rise will take somewhat less time (45-60 minutes).

Preheat the oven to 450°F. When oven is ready, turn loaves out onto a parchment or cornmeal/semolina-lined sheet pan or onto peel to load onto pizza stone. Slash the top of the loaves with a razor or sharp knife. For two loaves, bake for 45-60 minutes; for one large loaf, bake for 55-70 minutes. Bread is done when the crust has browned and loaf sounds hollow when you knock on the bottom.

Wednesday, November 7, 2012

Butternut, Coconut, Curry-nut?

Apparently, this has turned into the squash blog. Realizing this would be my third subsequent squash post, I almost posted about something else. However, the following things occurred to me:
  1. These are three quite different squash recipes, illustrating the versatility of the vegetable.
  2. Who would come here who doesn't want to hear more about squash‽
In my last post about squash-filled profiterole, I went on, possibly at too great a length, about why roasting a bunch of squash and keeping it in your fridge is a fabulous idea. I won't repeat myself, but it is; consider this recipe Exhibit B in the case. A rich, satisfying dish that balances sweet and savory, this contains a complete protein when you add rice and happens to be vegan, gluten-free and nut-free (the coconut, despite its name, does not affect those with tree-nut allergies).

As long as you already have roasted squash, this curry comes together in no time flat - about 20 minutes at the outside. Although I sometimes recommend forgetting to start the rice until well into cooking a dish to give you an incentive to let something simmer longer, this is a dish where you want to make sure to start the rice ahead of the other dish so you won't end up waiting on the rice.

I used a smallish (probably 2-3 lb) butternut squash for this dish, but other varieties of winter squash will also work. To roast squash, halve it, scoop out the seeds and place on a lightly oiled (foiled if you don't want to scrub) baking sheet. Bake at 375° for 35-60 minutes. Check at 30 minutes and poke the squash at its thickest part, then estimate how much longer until it's tender or check every 5-10 minutes.

Squash, Coconut & Chickpea Curry

vegan, gluten-free, nut-free
Takes about 20 minutes, serves 3-4
  • about 2 lb winter squash, roasted and cut into 1" cubes
  • 1 onion
  • 3 cloves garlic
  • 1 tsp brown mustard seed
  • ½ tsp. fenugreek seed
  • 1 tsp. cumin seed
  • ½ tsp. turmeric
  • ½ tsp. coriander
  • ½-1 tsp. red pepper flakes
  • ½-1 tsp. salt
  • 1 15 oz. can chick peas, drained
  • 1 can coconut milk
In large, heavy bottomed pot, heat a few teaspoons of veg. oil over high heat. Add mustard, fenugreek, cumin and coriander. Once the seeds start to sizzle and pop, add the garlic and onion. Once onion has started to soften and brown a bit, add chick peas, turmeric, red pepper and salt. Toss, then add squash and coconut milk. The squash will start to break down and blend into the coconut milk, making for thick, saucy goodness. The squash shouldn't totally dissolve and dissappear, though.

Simmer for a few minutes, adjust seasoning and serve over rice. Cilantro is also nice addition right at the end, too.

Monday, October 29, 2012

Pumpkin Caramel Profiterole

Let's talk about cream puffs. No, let's talk about squash first. I've eaten winter squash, in one form or another, for the last five days. The only problem with this is that I am currently out of squash.

Too many people go straight for cutting winter squash in half, adding butter, brown sugar and cinnamon and baking. There's nothing wrong with that, but squash can do so much more. In the last week, I have eaten squash in a Mexican-style rice bowl with beans and rice, a South Indian-style coconut and chick pea curry, on flatbread with eggs and tomato jam, in macaroni and cheese, and in cream puffs. And, of course, plain by the spoonful. It is no coincidence that asquash, one of the Algonquin roots from which the English word squash derives, simply means "eaten."

Roasting squash really is the only way to cook it: simmering it leaves it with a stringy texture and can sap out the flavor and copious nutrients. Roasting, on the other hand, enriches a squash's sweetness and creamy texture. I like to roast squash ahead of time, even when I'm not going to use it immediately, often a few at a time. As long as you're going to be at home for an hour, you can roast a squash. It doesn't need much attention while cooking. It keeps in the fridge for two weeks or so (in the unlikely occurrence that it sticks around that long) and provides instant squashy gratification.

To roast any variety of winter squash, turn on the oven to 375°; cut your squash in half and scoop out the seeds. The seeds, of course, can be roasted on their own for a toasty snack. Lay the halved squash cut side down on a lightly oiled sheet pan. Use foil if you don't feel like soaking/scrubbing later. Let it cook until squash is tender to the touch and the skin has started to brown up some. Depending on how large your squash is, this could be anywhere from 35-60 minutes. Set a timer for 30 minutes, poke the squash at its thickest point and decide how long you want to set the next timer for based on your squash-poking assessment.

Don't be too rigid in your squash variety selection, either. You may have a recipe for butternut squash soup or pumpkin pie, but you may find that you like the reverse, or that buttercup makes the best ravioli filling or that you are a fiend for hubbard squash in any form you can get it. A friend living in Germany for the year is finding that the only variety she can get, Hokkaidokürbis (Hokkaido, red kuri or baby red hubbard squash), works really well in places she'd expect to use pumpkin or butternut. A guide to about a dozen popular winter squash varieties is available here.

But enough about that. Let's talk about cream puffs, or profiterole, which is a fancy word which refers to anything creamy stuffed in a pâte à choux shell, usually ice cream or whipped cream (cream puffs typically involve pastry cream). The choux paste shell seems to have fallen out of favor in recent times. This is really a shame; they're a versatile vehicle for flavors sweet and savory. And when you think about it as basically making baked bubbles—which it is—making the shells themselves becomes magic even before you fill them.

Which brings us back to roasted squash. If pumpkin pie season can't come soon enough for you, take note: pumpkin profiterole. Or, whatever kind of roasted winter squash you have profiterole. In fact, unless you're starting with a premade crust, these can be ready faster than a pumpkin pie. Moreover, pâte à choux is not appreciably more fussy than a pie crust (Warning: making pâte à choux can be habit-forming). Also, they look way more impressive, especially when you add a drizzle of caramel. The filling is a mixture of roasted squash, brown sugar and the spices you would add to pumpkin pie, folded with a simple whipped cream. The overall effect is an ethereal few bites of creamy, spiced delight.

Pumpkin Profiterole

The recipe here is more a series of components rather than one recipe. After making the choux paste shells, squash filling and caramel, spoon or pipe the filling into the shells and drizzle caramel over the top. Serve promptly.

Pâte à choux

Adapted from Joy of Cooking
makes about 15 two-inch cream puff shells
  • 4 large eggs at room temp.
  • Dry mix:
  • 1 c. AP flour
  • 1/4 tsp salt
  • (optionally add 1 T sugar)
  • Wet Mix:
  • 1 c water/milk
  • 1/3 c. butter
Preheat oven to 400°. Sift dry mix together and set aside. Heat wet mix together in a large, heavy saucepan;
when it boils, add dry mix all at once and stir briskly, until it becomes a smooth paste and stops sticking to the sides and bottom of the pan. (see above)

Add eggs one at a time, beating thoroughly after each addition (some people like to do this in the food processor). Spoon or pipe the paste onto parchment-lined sheet pans in mounds about 1½" across, leaving room for them to puff up. Bake at 400° for 10 minutes, then turn the oven down to 350° and bake for another 25 minutes, or until quite firm to the touch. Gently stab each with a sharp paring knife to vent it so it cools enough to accept filling without melting it quickly.

Filling

  • 1 c. mashed squash (canned will also work)
  • ½ c. brown sugar
  • ½ tsp. salt
  • 1 tsp. cinnamon
  • ½ tsp. nutmeg
  • ½ tsp. ground ginger
  • ½ tsp. clove
  • ½ c. whipping cream
Whip cream. Blend all other ingredients and then fold into whipped cream.

Caramel Sauce

Recipe adapted from David Lebovitz's Ready for Dessert
Lebovitz's blog, Living the Sweet Life in Paris is always a good read as well.
  • ½ c. (1 stick) butter (salted or not, up to you), cut into pieces
  • 1 c. sugar
  • 1 c. heavy cream
  • ¼ tsp. salt, or to taste
  • Optional:
  • ¼ c. bourbon (a little more than a shot)
In a large heavy-bottomed saucepan (deep is important because it will bubble up pretty aggressively after the cream is added), heat the butter and sugar over medium heat. Stir occasionally until the sugar begins to caramelize. When it reaches a dark amber color and smells on the verge of burning, remove from heat and immediately add the cream. Stir until smooth, then stir in salt and bourbon. Letting the sauce cool to at least room temperature gives you a thicker, more caramelly sauce texture, but you can use it before that. Sauce can be stored for up to 2 weeks if refrigerated and a spoonful in a cup of coffee or black tea makes the world a beautiful place.

Sunday, September 23, 2012

Mole Gringo, with only a dozen(ish) ingredients

Reading about traditional moles makes me feel like a total poser, but it also makes me hungry. My students are currently reading What the Moon Saw, a thinly veiled ethnography of a rural village in the southern Mexican state of Oaxaca, for another one of their classes. I snagged it to read one day last week in the name of integrated curriculum and devoured it more or less in one sitting, give or take snacks. Oh, YF books, you go down so smooth. It is also a fairly good coming-of-age story about a teenage girl from the burbs of DC meeting her Mexican grandparents for the first time, finding out her grandmother is a curandera (shamanistic healer), and falling for a local boy who sings revolutionary songs real pretty. Moles, though never mentioned by that name are, along with hot chocolate and corn tortillas, essential to the story. In one of her grandmother's stories, a friend recalls a situation in which she planned on killing herself, but decided to make chicken with chocolate-chile sauce as a final meal and decided life was worth it after all. Mole proved to be her reason to keep living.

The word mole comes from a Nahuatl word, molli, which simply means "sauce," though it lines up interestingly with the direct-from-Latin Spanish verb moler, "to grind," an essential process in making mole. Nahuatl, a group of
languages from across southern Mexico, is the source for a surprising number of English words: chocolate, avocado, guacamole, tamale, chili, coyote, and tomato are all of Nahuatl origin, filtered through Spanish. Seeing as the term of origin is as broad as it is, it's unsurprising that there are a wide variety of moles across southern Mexico. They vary in complexity and focus, but have a few things in common: all begin with a variety of chiles, and from there are built out of spices and ingredients that make it sweet, like dried fruit; sour, like tomato or tomatillo; and thick, like nuts, seeds and starch. Oaxaca, where the book takes place, is known in some circles as the "Land of Seven Moles" but it's much broader than that - think of the seven moles a little like the five classic French mother sauces. They're more like guidelines. The most complex of these moles have nearly 40 different ingredients and can take days to make, so it's easy to see where folks might be overwhelmed by the idea of making it on their own for anything short of something very special, and miss out on the joys still available from a simplified mole.

Saturday, December 24, 2011

Last Minute Gift Idea: DIY Hot Cocoa Mix


Window decor by my 8th graders. Tis the season for geometry!

How do I always end up with such an extensive list of things to do on Christmas Eve? I mean aside from the working flat-out until the day before, inevitable last-minute inspirations for the perfect handmade gift that cannot be made at the last minute, the fact that Christmas Eve is the big celebration in our family, all with a side of being easily distracted?

All to-do list anxiety aside, this twofold revelation crossed a few things off my list in one fell swoop:
  1. Hot cocoa mix, even custom hot cocoa mix, is really easy to make.
  2. Most people really like hot cocoa.
The hardest decision to make here is whether you want to put together a mix-with-milk or a mix-with-water variety. As much as I'm happy to heat up milk at home, it's not going to happen at work since it's not practical for me to keep milk there. I actually used to keep a tub of cheap cocoa mix at work to add to my coffee in lieu of sugar and milk. I also know that some of the folks to whom I am giving this cocoa mix are not as well-inclined to heat up milk for cocoa. So, I decided to opt for a variety that would work mixed only with hot water.

Thursday, November 3, 2011

Root-Beer Rarebit Soup: Ultimate Soup for Ultimate Soup Weather

So, as you may have heard, New England had a little snow last weekend.

And by a little snow, we mean a foot of wet, heavy stuff that downed large limbs and knocked power out for millions of people in the Northeast. Including us, for about three and a half days. Growing up, I always used to look forward to power outages; they were all about hanging out around the woodstove, playing cards with the family while drinking cocoa by candlelight. Some key details embedded in that sentence: woodstove, which implies heat; drinking cocoa, which implies ability to cook. As long as you have those two things, life goes on pretty much as normal, give or take having to refill the toilet tank manually from the gallons of water you keep specifically for times like this because the well pump runs on electric. As is, our apartment's heat and cook stove both require electricity to run, so we were without both.

So, we decided to revisit the idyllic side of the power going out and headed up to Vermont, after hearing we could be without power for up to a week (as of writing, Western Mass Electric reports that 26% of its customers - over 56,000 people - are still without service, though they have been working flat out since Sunday). We were planning on getting together on Sunday anyhow, to make dinner for Maria's birthday, so we just made a venue change and headed north. Sunday turned out to be a beautiful day - they mostly have been since the storm - clear blue skies and snow melting like it was going out of style. Ironically, the power in Vermont came back on Sunday afternoon, shortly after we got up there. We heard later that some friends from Northampton actually drove up to Brattleboro and rented a motel room to stay warm after returning home to no heat from a brisk weekend in New York, spent mostly outside.

Stopping by Mom's on the way home on Monday afternoon (my heat wasn't on, but it was at school, so they planned to be open Tuesday), she pressed some of the soup she had just made on me, and that soup has pretty much been the template for this week: Pumpkin. Cheddar. Beer.
It sounds like an obviously genius idea upon hearing it; the ultimate soup for the ultimate soup weather. Since then, I've been adapting it to accommodate the variety of sweet winter vegetables that predominate this time of year. Both recipes are adaptations of Mollie Katzen's "Pumpkin Rarebit Soup" from the classic Hippie-American cookbook The Enchanted Broccoli Forest.

Our CSA farm's winter squash crop, planted on the banks of the Connecticut River, was drowned by flooding during Hurricane Irene. However, this year marked their best harvest of sweet potatoes ever, so sweet potatoes have been doing double duty for us in many of the places that we would typically use squash (unfortunately, they don't make very good jack o'lanterns). We offered to cook dinner for some friends in Northampton, with whom we stayed two nights after their power came back online before ours, to thank them for their hospitality.
They let us know that in addition to our sweet potatoes, they had a whole mess of leeks and parsnips they weren't sure what to do with, so they went into the soup, too. Pretty much any sweet fall vegetables will work: winter squash, sweet potatoes, parsnip, carrot, turnip, etc. I picked up a bunch of the perennial favorite Smuttynose Old Brown Dog, a brown ale which balances well a nutty caramel maltiness with a crisply hopped flavor and which actually has its origins in Northampton, to go in and with the soup. I also amped it up a little with the addition of my old friend chipotle and came up with a soup that merited three bowlfuls from at least one diner.
Sweet fall vegetables. Cheddar. Beer.

Root-Beer Rarebit Soup

vegetarian, serves 4-6
  • 1 leek, halved and cut into ½" thick half-rounds OR 1 small onion, medium dice
  • 1 Tblsp. butter
  • 1 qt. mixed sweet fall vegetables, cut into about ½" cubes ← you can also use roasted vegetables here for a quicker soup
  • 1½ c. (12 oz.) beer (I used a brown ale, Katzen recommends a lighter ale, you know what you like)
  • 1½ c. water or stock (vegetable or chicken)
  • 1 heaping cup grated sharp cheddar cheese
  • 1 tsp ground, dried chipotle OR 1 canned chipotle in adobo, minced (optional)
  • salt and pepper to taste
In a 3 qt. or larger soup pot, melt butter and begin cooking leeks or onions over med-low heat. Lightly salt. I like to start this process, then start prepping the rest of the vegetables just to make myself patient and give the leeks/onions enough time to cook soft. Add the vegetables. If you're using roasted vegetables, you can add the beer/stock/water immediately. If using fresh, you want to give them about 15 minutes to cook before adding liquid. Once the vegetables have started to get soft (almost immediately for roasted, and about 30 min for fresh), blend until smooth. Add grated cheese and stir until melted and combined. Add chipotle, if using, adjust salt and pepper and serve, ideally with more of whatever beer went into the soup and with a bread robust enough to match (Hungry Ghost Bread, which bakes in a wood-fired oven was one of the first and only places open on Sunday. They had lines out the door for hours.)

Thursday, September 29, 2011

Spuds: Gnocchi with leek, kale and sage butter

From the Potato Festival at Sentry Hill Historic House, UK

Potatoes are starting to come in from the farm, and so I've been giggling about potatoes a lot recently.

Why are potatoes so damn funny, anyway?

Way back when I was an active linguistics major, a friend and I half-seriously started developing a phonetic theory of humor. Which is to say, determining which sounds produced by the human vocal tracts and which features of them were inherently funny. We compared oodles of words that made us giggle. We looked at beautiful sounding things, like cellar door, and inverted their qualities. We combined a number of funny features and found ourselves in a Swedish Chef routine. I don't remember everything about our inquiry and findings, but as far as I remember, it doesn't quite predict the humor of potato. It doesn't have any awkward consonant clusters, its vowels display one or fewer of the funny features (high, front, rounded). Still, again and again, it comes up as hilarious, context or no.


Cheryl Wheeler sings about potatoes to the tune of the Mexican Hat Dance

Maybe it's the humble simplicity of the potato. Maybe it's just that it's hard not to smile about potatoes, all or part of many classic comfort foods. Gnocchi is one such dish, an Italian pasta which often features...potatoes! I mean, seriously, does it get any more comfort food than that? (Answer: you fry onions in butter and put them on the potato pasta)

Potatoes, of course, are a relatively recent addition to European cuisine, not showing up on the scene until at least the 16th century, which makes their relative ubiquity throughout Europe and its cultural progeny all the more staggering.
Gnocchi's history in Italy goes back much farther than that of the potato. The earliest versions, dating back over 2,000 years, involved mixing leftover semolina porridge with eggs and cutting it into small pieces. Gnocchi made with ricotta also have a long history. All versions, though, produce tender little pillows of dough, boiled to perfection and hard to resist.

As far as homemade pasta goes, this one is fairly easy. It doesn't beg for special equipment like a pasta roller, and doesn't entail the same kind of bicep-building battles as does a stiff semolina dough. They pair well with most deep fall flavors, but here we've pretty much kept it to butter, sage, leek and kale. Even from this, you can pare it down to butter, sage and black pepper and still be blissful.


Potato Gnocchi with Leek, Kale and Sage Butter

vegetarian, optionally vegan/dairy-free
Serves 2-3

    The Gnocchi:
  • 3-4 med. peeled potatoes (about a pound), boiled or roasted, then milled, riced or mashed
  • 1 Tblsp. butter or olive oil
  • 1 tsp. salt
  • 1 c. all-purpose flour (plus flour for dusting)

  • The Rest:
  • 2 Tblsp. butter, olive oil or margarine (we are not kidding around)
  • 1 leek, cut into long thickish strips about 5" long
  • ¼ chopped fresh sage and/or tarragon (or to taste)
  • 8-10 stems kale, destemmed and roughly torn
  • ½ c. mushroom, veggie or chicken broth
  • salt and pepper to taste

Traditionally, the potatoes for this are cooked whole and in their skins, then peeled and ground up into mush (Note: good use for leftover baked potato!). I'm not sure exactly what the logic behind this is, though I suspect it's about trying to keep the spud's moisture balance. If it takes on too much liquid, you'll be forced to add more flour and make a tougher, less potato-y end product. Too little, and you won't get smooth potato taste. That said, I haven't experimented with other ways of cooking a potato for this, so I can't tell you that they don't work.

In any event, once you've reached the point of cooked and peeled, you want to put it through a ricer or food mill. You want a pretty smooth mashy texture. Work in the butter or oil and salt, then start working in the flour. Unlike most pasta dough, where you are trying to develop the gluten pretty strongly, you want to knead this just to the point of coming together into a ball.

Once you have incorporated all the flour, cut the dough into 4-5 sections and roll each into a snake about ¾" in diameter. Cut into ¾-1" sections. Flatten each slightly against the back of a fork with your thumb. At this point, you can boil them for prompt eating, or freeze them for later. If eating now,
boil in at least 1 gallon lightly salted water in a big pasta pot. While you're waiting, prep the leeks, kale and herbs. Melt butter over medium heat in a 10" cast iron skillet or similar, and let butter brown a little before adding leeks. Once leeks start to get soft, season with salt and pepper, add kale and broth and cover. Shortly before adding boiled, drained gnocchi, add herbs and toss. Adjust seasoning to taste and serve.

LinkWithin

Related Posts Plugin for WordPress, Blogger...