Showing posts with label asian. Show all posts

Tuesday, July 8, 2014

Peanut Noodles with Spring Greens. And an Egg.

For what it's worth, I wasn't complaining about the cold in February. Complaining about the dark, maybe. I save my temperature complaining for when it's hot out. It pairs well with my cantankerous stubbornness about air conditioning. Today peaked at 95°. Certainly not as hot as it can get around here, but just as certainly beyond comfortable.

Regardless of how warm it was today, here or where you were, we all have those days where the mere thought of turning on the stove makes you want to get another icy drink out. I've been realizing how much peanut sauce is a hot-weather staple for me recently: Fresh summer rolls dipped in it, drizzled over lettuce-wrapped rice (with or without anything else), or even just a bowl of veggies and a jar of peanut sauce.

This has been the recipe I've come back to more than others recently. Here, the peanut sauce dresses up cold buckwheat noodles tossed with long, thin cut cucumber or summer squash (inspired by zucchini noodles) and the piquant blend of greens I've been gradually thinning out of my garden. And ,just for good measure, an egg on top. Since discovering steam-cooked hard boiled eggs (a method which I can't recommend heartily enough), I've been putting them in all kinds of things. I'll let The Food Lab go into detail about the method, but by way of my recommendation, it is faster than other boil methods (since you only have to wait for ½" of water to come to a boil), and I have had an almost perfect peel record with it. The closest thing to an imperfect peel I've had since starting to use it is actually in the photos of this dish, and I'm pretty sure that one was my fault.

It's pretty good without the egg, too, though, and is totally vegan without it. If you're not eating eggs for whatever reason, the peanut sauce does provide a little protein, but I've also made and enjoyed this with crispy-fried bits of tempeh.

Peanut Noodles with Spring Greens

2 servings
  • 100 g soba noodles (one bunch)
  • 1 cucumber or small summer squash/zucchini
  • ¼ c. peanut sauce (see below)
  • 2-3 c. mixed baby greens (1-2 good handfuls per serving)
  • 2 eggs, boiled (or steamed!) to your preference (I like about 8 minutes here)
  • optional but nice:
    • scallion, sliced thin
    • a few sprigs of cilantro


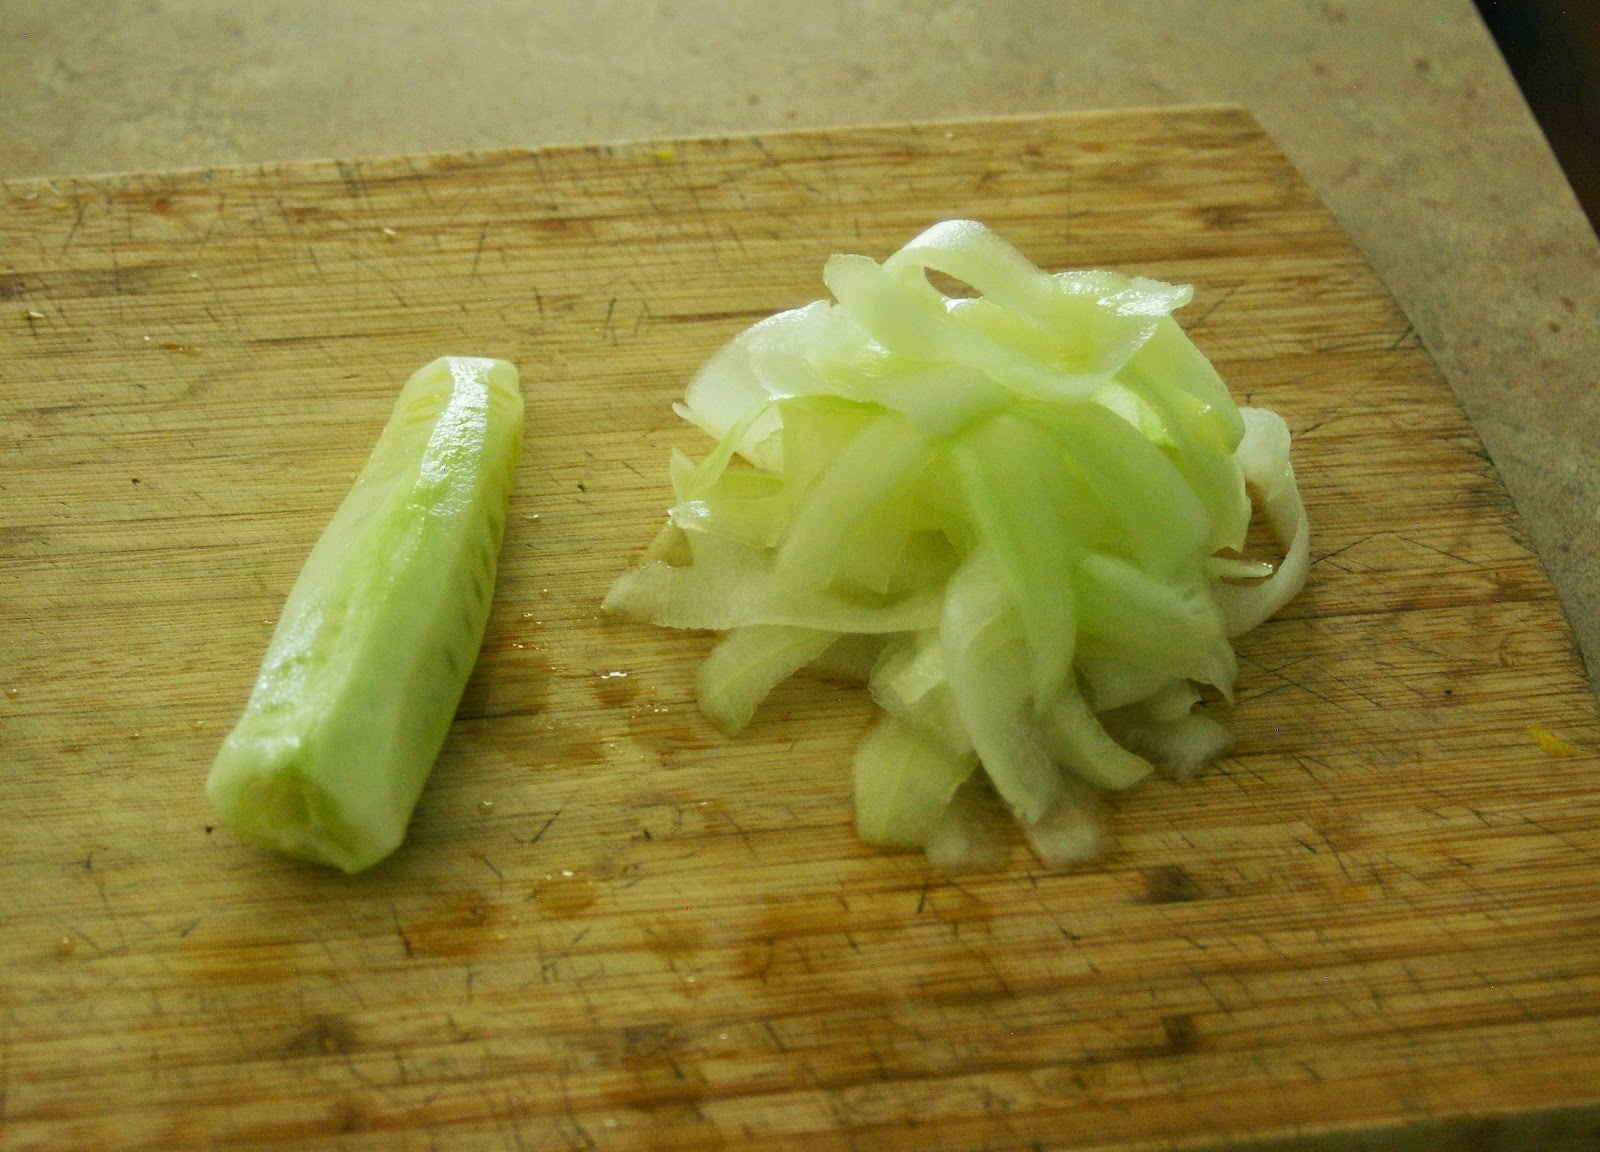
Start by putting on water to boil the noodles and cook the eggs (if you've got time, you can use the same pot and do the eggs after the noodles). While the water is heating up, peel your cucumber or squash. They're both very tasty here, and bulk out the noodles with cool fresh flavor. If you've got a spiral slicer or julienne peeler, good for you. You know what to do, so go to town. Otherwise, use your vegetable peeler to peel thin slices off of the cucumber or squash until you get down to the seeds. If you prefer, you can slice these strips thinner to blend in with the noodles more.

Once the noodles are cooked, make sure to run cool water through them until chilled. Toss the noodles and cucumber/squash in the sauce until well coated. Divide up into bowls and toss with a handful of greens, then top with an egg.


Peanut Sauce

vegan, gluten-free depending on your soy sauce
makes about 1 cup of sauce
  • ¼ c. peanut butter (Mine is creamy, natural & salted. Yours will work too, but you might have to add more or less stuff)
  • 1-2 Tblsp. sugar
  • 1 clove garlic, minced
  • 1 tsp. minced fresh ginger
  • ½-1 tsp. thick chili-garlic sauce like Sriracha or sambal oelek
  • (or more, to taste)
  • 2 Tblsp. soy sauce
  • ¼- c. water
Add all ingredients except water. Add water a tablespoon or so at a time, stirring until thoroughly combined before adding more water. If you add too much water at once, the suspension will break and you'll get weird thready peanut-butter bits in seasoned water. If this happens, add a little more peanut butter and stir until smooth. You'll have to add more water later. Adjust seasoning as necessary.

Thursday, May 9, 2013

Curried Tempeh with Mustard Greens and Cellophane Noodles

I'll be perfectly honest: I didn't like tempeh as a kid.

In fact, early experiences with tempeh meant that I didn't give it much of a chance again until about a year ago, but, boy howdy, am I making up for lost time.

Tempeh is a protein-rich food made from split soybeans and, sometimes, a variety of grains which have been parcooked and innoculated with Rhizopus oligosporus, a type of fungus, and incubated for 24-48 hours. The culture partially ferments the legumes/grains, making them easier to digest, and binds them together into a firm cake with a mild flavor somewhere between nuts and mushrooms. It can be sliced or crumbled and holds up to grilling or stir-frying. Most tempeh is gluten-free, but, if you're concerned about that kind of thing, it's important to read the labels on multigrain tempehs, which vary in contents, but sometimes include gluten-bearing barley or rye.

In its native Indonesia, it's very often served fried or grilled, often with some kind of lightly sweet & spicy accompaniment. Peanuts turn up with it a lot too. For me, I've found that I still don't fancy the taste of plain tempeh - despite liking nuts, mushrooms and tempeh - but that sauteéing it until it's a little crispy with some salt or soy sauce makes a world of difference.

Recently, I've been cooking it up in a spicy-sweet stir-fry with mustard greens, largely inspired by this South Indian take on tempeh from Delectible Victuals, with the addition of a generous helping of fresh cilantro, including the stems. It's good over rice, but it's great tossed with thin cellophane noodles, made from mung beans and also gluten free (available at Asian markets - rice vermicelli is a good, slightly more common replacement and any other thin, clear noodle would work). If you want to serve with rice or bread, you can simply omit the steps in the recipe below involving the noodles. It's also at least as good cold the next day.

Curried Tempeh with Mustard Greens and Cellophane Noodles

vegan, gluten-free (depending on tempeh, soy-sauce)
Ready in about 30 minutes, serves 2-3
  • 1 small-medium onion, small dice
  • 2-3 cloves garlic, minced
  • ½ red bell pepper, medium dice
  • 1-2 tsp. light-flavored oil
  • 1 tsp. ground turmeric
  • handful cilantro
  • soy sauce
  • 1 Tblsp. sugar
  • 1 8-oz. package tempeh, crumbled
  • thick chili sauce, like sambal oelek or sriracha, to taste (start with 1-2 tsp.)
  • 1 good sized bunch mustard greens or other medium-weight green like swiss chard, sliced into 1" ribbons
  • about 4 oz. dried cellophane noodles - in the packages I get, this is two bundles
  • crushed peanuts (optional)
Start by putting the noodles in a bowl of warm water to soak, which is all the precooking they need. They will need to soak at least 15 minutes. Prep the veggies and crumble tempeh coarsely. Cut off the bottom half of the cilantro stalks. Set aside the leafy end for later and mince the stem end very small.

Heat a large wok or skillet over a high heat. Add a teaspoon or two of oil and swirl to coat. Add tempeh and a teaspoon or two of soy sauce. Cook until tempeh becomes browned and a little crispy. Set aside and try not to pick at it too much. Wilt the greens slightly in a separate pan with a tight fitting lid by putting on medium-low heat with a tiny bit of water in the bottom. The greens will reduce in volume by at least half.

Add a little more oil to the wok or skillet and add the onions, garlic, bell pepper and minced cilantro stem. Saute until the peppers and onions get a little color, then add the turmeric and sugar. Add the tempeh and chili sauce. Drain the noodles, then add the wilted greens and noodles to the wok or skillet. Toss to combine. Remove from heat and toss with roughly chopped cilantro leaves. Adjust soy sauce, chili and sweet levels as desired. Serve with optional crushed peanuts on top.

Wednesday, November 7, 2012

Butternut, Coconut, Curry-nut?

Apparently, this has turned into the squash blog. Realizing this would be my third subsequent squash post, I almost posted about something else. However, the following things occurred to me:
  1. These are three quite different squash recipes, illustrating the versatility of the vegetable.
  2. Who would come here who doesn't want to hear more about squash‽
In my last post about squash-filled profiterole, I went on, possibly at too great a length, about why roasting a bunch of squash and keeping it in your fridge is a fabulous idea. I won't repeat myself, but it is; consider this recipe Exhibit B in the case. A rich, satisfying dish that balances sweet and savory, this contains a complete protein when you add rice and happens to be vegan, gluten-free and nut-free (the coconut, despite its name, does not affect those with tree-nut allergies).

As long as you already have roasted squash, this curry comes together in no time flat - about 20 minutes at the outside. Although I sometimes recommend forgetting to start the rice until well into cooking a dish to give you an incentive to let something simmer longer, this is a dish where you want to make sure to start the rice ahead of the other dish so you won't end up waiting on the rice.

I used a smallish (probably 2-3 lb) butternut squash for this dish, but other varieties of winter squash will also work. To roast squash, halve it, scoop out the seeds and place on a lightly oiled (foiled if you don't want to scrub) baking sheet. Bake at 375° for 35-60 minutes. Check at 30 minutes and poke the squash at its thickest part, then estimate how much longer until it's tender or check every 5-10 minutes.

Squash, Coconut & Chickpea Curry

vegan, gluten-free, nut-free
Takes about 20 minutes, serves 3-4
  • about 2 lb winter squash, roasted and cut into 1" cubes
  • 1 onion
  • 3 cloves garlic
  • 1 tsp brown mustard seed
  • ½ tsp. fenugreek seed
  • 1 tsp. cumin seed
  • ½ tsp. turmeric
  • ½ tsp. coriander
  • ½-1 tsp. red pepper flakes
  • ½-1 tsp. salt
  • 1 15 oz. can chick peas, drained
  • 1 can coconut milk
In large, heavy bottomed pot, heat a few teaspoons of veg. oil over high heat. Add mustard, fenugreek, cumin and coriander. Once the seeds start to sizzle and pop, add the garlic and onion. Once onion has started to soften and brown a bit, add chick peas, turmeric, red pepper and salt. Toss, then add squash and coconut milk. The squash will start to break down and blend into the coconut milk, making for thick, saucy goodness. The squash shouldn't totally dissolve and dissappear, though.

Simmer for a few minutes, adjust seasoning and serve over rice. Cilantro is also nice addition right at the end, too.

Monday, September 3, 2012

The Co-op's Korean Spinach

I'm pretty sure that the reason I would happily down this entire bowl of spinach has more to do with it being tasty than about it tasting like good memories, but it can be hard to tell the difference sometimes.

This is a great spinach dish for people who think they don't like spinach: it has a mild, savory flavor that enchants all kinds of palates. It's also, starting with frozen spinach and adding very little, highly nutritious and cheap as chaff.

Wednesday, August 1, 2012

Can I Call it Kimchi? vol. 2

Do you ever get the impression that the contents of your fridge are judging you? That the longer an item has been there, the harsher its critique? Or is that just me?

A surprisingly high proportion of my cooking and eating habits are based around trying to make it up to that half cabbage languishing in the vegetable drawer or that barely-scooped pint of rice that came with the take-out food and has outlasted its compatriots, or whatever else is languishing forlornly in there, in the cold and the dark. Okay, so maybe I'm overdramatizing things, but I'm also making myself feel guilty digging into that overanalysis of why I hate wasting food.

But I digress. Pickling is a great solution to this important moral dilemma on just about every front. Not only is a great direction for leftovers, namely those tragic survivors of the vegetable drawer, but, once pickled they stay good for far longer, meaning you can take them off the fridge worry list. You might even be more inclined to use them.


My first adventure with kimchi late last summer really opened it up as a flexible, accessible, exciting framework, both in research and in practice.

Wednesday, July 18, 2012

The Kohlrabi: Spherical, but quite pointy in parts!

What is Sputnik doing in my CSA share?!

One of the best parts of a farm share is the surprises: the chances to meet a new ingredient head on, figure out what makes it tick like a tasty bomb, and eat it up. Kohlrabi is one that I'm still figuring out, and the friends with whom I do farm pickup have been left scratching their heads as well. It's only in the share a once or twice out of the year, and each year has slowly revealed its charms a little more. This year, I think I finally have its number.

CSA-share head-scratch staple kohlrabi, which looks like a more organic version of Sputnik (spherical, but quite pointy in parts!), is part of the largely familiar Brassica oleracea crew, which includes kale, broccoli, cauliflower, Brussels sprouts and cabbage (but not napa cabbage or bok choy, which are Brassica rapa). It's remarkable to think that they're all the same species, but, then again, so are chihuahuas and Irish wolfhounds.

Sunday, May 20, 2012

Forget Spring Rolls: Summer Rolls

I've been suffering urges to eat live green things by the fistful recently. There's something about the onset of hot weather and the boisterous upspringing of plants that makes me want to rip off their tender little leaves and eat them like a hungry, hungry beast. It's like I'm trying to cram in all of the fresh air and sunlight they've absorbed. I am eating plants the way some ancient warriors consumed the heart of their enemy: to gain their strength and wisdom. There's a Philip K. Dick short story, "Piper in the Woods", in which people, suddenly craving a simpler life, start claiming that they have become plants. There's a certain appeal to it: what if sitting still, smiling at the sun all day fulfilled all of your needs? In the absence of that, or, rather, the presence of all the other things that must be done, or that I do anyway, I try to steal the essence of leafy plants. By serenely dismembering and eating them.

Vietnamese gỏi cuốn, literally, "salad rolls" but also known as summer rolls or Vietnamese spring rolls, combine fragrant, leafy herbs, crisp veggies like bean sprouts and thin-cut carrot and cucumber, and a little bit of protein, usually from shrimp or shredded chicken and roll it all up in bánh tráng, rice paper. Not only do they satisfy my unholy cravings for crisp, green crunch, but they also require very little prep and even less time with the stove going, which is always at a premium when it gets hot out. Even more so, they're fun to put together and make dinner into a great group activity.

Monday, October 10, 2011

Freedom Eggs: Protein, History and Good Karma, together at Last (Kunming Tomato and Egg)

We recently started getting eggs from a family at the school where I teach. Local eggs are something I'd been meaning to catch up with for a while, but despite my good intentions driving by "Fresh Eggs" signs alongside the road, it hadn't happened yet. So when I saw a flyer in the school lobby advertising weekly delivery to the school, I was sold. Someone's going to bring me a dozen eggs every other week at school? Awesome.

The family farm in question is an interesting place. It's on the site of the Ross Farm in Florence, MA, the last remaining building of a center of 19th century abolitionist and civil rights activism and stop on the Underground Railroad. At various points in that epoch of its history, it played host to such historical figures as Sojourner Truth (one of Florence's most celebrated historical residents) and Frederick Douglass, who was a frequent lecturer there.

These days, the farm is the family homestead of the Walker/Hammarlund clan, and also plays host to an herb farm run by another couple. I first caught wind of their project shortly after a play about local abolitionists by the class of one of their kids used a field trip to their house as a narrative framework. Someone mentioned that they were gearing up to start doing egg delivery by donkey cart. As if this operation needed to be any more stylish (donkey cart delivery is only available within Florence).

Shortly before the beginning of the school year, the farm was impacted by flooding of the Mill River caused by Hurricane Irene, which came up fairly suddenly and found them literally tossing chickens out of the barn to keep them away from the rising floodwaters.

In any event, we've been enjoying the eggs. I cracked open a double-yolker earlier today. However, going through a dozen eggs in two weeks is a quicker pace than we're accustomed to. It will pick up when I get into serious soup for lunch season and start including eggs in my lunch more often than not. In the meantime, this very simple dish has saved the day from the cranky hungries (or "the hangries" as we call it) a few times over the last few weeks. While any number of cultures have their own simple dishes focused on egg and tomato, this is one Maria learned from her Chinese professor in college, who was from Kunming in the southwestern Yunnan province (fun fact! in Mandarin, the word for tomato directly translates as "barbarian eggplant"). It's little more effort than plain scrambled eggs, but so much more satisfying.

Kunming-style Tomato and Egg

vegetarian, gluten-free
serves 1, 10 minutes start to finish
  • 2 eggs
  • 1 small or ½ large tomato, large dice (or a small handful of cherry tomatoes, halved or quartered)
  • 1-2 scallions, sliced into rounds
  • OR
  • 1 clove garlic, minced
  • 1 tsp. soy sauce
  • ½ tsp. sugar
  • ¼-½ tsp. salt
  • a drizzle or spritz of oil to grease the pan
Crack eggs in a bowl and whisk with a few pinches of salt and about half the sugar. Prep the tomatoes and scallions/garlic. Heat pan on med-high heat. Add oil and the garlic or half the scallion. Give it about 30 seconds to start smelling toasty, then add the egg. Start cooking it in an undisturbed sheet, as for an omelet. Pull up the sides every so often and tip/swirl the liquid egg out to the edges to cook. Once it's mostly set, break it up and add the tomato, soy sauce and remaining scallion and sugar. Serve hot on its own, over a little rice or with a piece of toast.

Saturday, August 27, 2011

Can I Call It Kimchi?

I've been threatening to make kimchi for years now. It's probably the pickled product I eat most frequently, above sauerkraut or even (cucumber) pickles. I eat it in soups, fried rice, stir-fries, tucked inside dumplings and right out of the jar. If you're not familiar with it, kimchi is the broader name for the ubiquitous class of Korean pickled vegetables that comes in many forms seasonally and regionally. The most instantly-recognizable version of it, paechu kimchi, is primarily composed of napa cabbage, usually with daikon radish and scallion, liberally dosed with ginger, garlic and ground chile and, often, ground, dried shrimp and anchovy sauce.

Most versions of it contain at least one of the above ingredients. However, as most is true with many beloved culinary archetypes, such as pierogi and gumbo, the authenticity of which are fiercely defended, it's "authentically" made with whatever's available at the time. Spring tends to bring radish-based kimchi and summer kimchi often includes light greens and cucumber, while fall is dominated by cabbage. Additionally, chiles were not introduced to Korean cuisine until about the 17th century, while kimchi dates back to at least the 13th century, so much of the history of kimchi exists without chiles, as do some varieties of the dish.

Paechu kimchi is often made in large quantities during the November cabbage harvest, to store up for the winter. Historically, this kimchi is made during kimjang, events where a family or community will gather to process truly impressive quantities of cabbage and other ingredients. While an increasing number of Koreans buy most of their kimchi, the practice of kimjang is still alive and well in many families. Saveur magazine chronicled one family's kimjang process in a 2009 article, "The Art of Kimchi".

I'm not entirely sure what's taken me so long to try it out myself. In many ways, it's more simple than many pickling projects. Here's the process in 5 easy steps, including eating:
  1. Cut vegetables.
  2. Brine vegetables.
  3. Season vegetables.
  4. Ignore vegetables.
  5. Eat pickles.
I think part of my reticence is that I'm wary of projects that may involve me ruining large quantities of food, and it seems a little silly to make just a tiny amount of kimchi. However, when I found myself staring down an 11 lb. cabbage from the farmshare that had been languishing in the vegetable drawer for a couple weeks, just taking up space, I knew it was time. Looking at my ingredients, I found that, aside from the aromatic trio of garlic, ginger and chili, I had none of the traditional ingredients. The cabbage wasn't even an Asian variety, but a rather sweet, but more traditionally European type. I also decided to use beets, in place of radish or other crisp rooties. As I've mentioned here previously, I have a thing for beets.


The next obstacle was a fermentation vessel. The most traditional forms of kimchi are fermented in earthenware vessels buried in the ground to keep them at a cool, consistent temperature (à la root cellar). Metal, which can react and interfere with the fermentation process, is out. Most of my large glass containers are currently being used for grain storage or for Maria's kombucha babies. Plastic is workable, but I spent a while ogling various, purpose-designed earthenware fermentation crocks, which are gorgeous and well-designed, but rather expensive. Then, in my preliminary research, I came across a stunningly elegant suggestion from wild fermentation guru Sandor "Sandorkraut" Katz: a crockpot is a glazed earthenware vessel - with a lid, no less - and if you don't have one, you can probably find one at the thrift store for $5 or less.

Armed with cabbage, beets and my crockpot, I finally got started. I sliced up about 5 lb. of cabbage and three big beets and set them in a salt solution (¼ c. salt:1 qt water, shake vigorously until salt dissolves, repeat as necessary to cover veggies) overnight, half in the crockpot and half in a big plastic bowl. For weights, I found two different plates that fit neatly over the top of each vessel and pressed them down, weighting them with jars full of water. The next day, I drained off the brine (reserving the brine from one of the two bowls), and dumped all the veggies into the bowl to be mixed with the aromatics. They had reduced in volume somewhat after their night in the brine, and fit into one of the two containers. I didn't have any of the traditional Korean chile powder, but was determined not to go buy something specifically for this project, so I took the suggestion of the Tigress, whose basic recipe I was using for guidance, of using a blend of equal portions cayenne and sweet paprika. I also minced up a whole head of garlic about an equal volume of fresh ginger. I put on a pair of gloves and went to town massaging the spices and a little sugar into the veggies. I loaded the whole mess back into the crockpot, poured in just enough of the reserved brine to cover, weighted it with a small plate and a bowl of water, put the lid on and stuck it in a dark corner of the counter to be ignored.

Ignoring it and waiting: this is really the hardest part. Thankfully, it's not a project that also bears the "leave alone; do not touch" instruction; you can and should poke at it and sample it daily until it's fermented to your taste. It should start to bubble and develop a sour tang after about 2 days, and should reach fermented fullness after 3-6 days, depending on temperature and other conditions. Mine got so excited when the fermentation really kicked in on Night 2 that it burped up some of its liquid on the counter. Once it's sour enough for your taste, you can load it into jars and put it in the fridge, which will slow the fermentation drastically, so it won't get more sour.

Unlike many other preserving projects, like jams or the recent watermelon rind pickles, you don't want to process this one in a hot water bath; that would kill all the happy little probiotic beasties, namely, Lactobacilli bacteria. This is the same family of little guys that also help make yogurt, beer, wine, and sourdough (there is actually a specific Lactobacillus kimchii!), and are responsible for many of the numerous touted health benefits of kimchi. Kimchi has been reputed to help everything from colds to UTIs (both of which, interestingly, have research to back them up) to cancer and stress, and many ailments in between. As far as nasty bacteria that could make you sick, salting the vegetables prevents the growth of harmful bacteria. If you think about the process, it's similar to making yogurt, and no more likely to make you sick.

We'll see what the next round will bring; now that I've gotten over the initial hump of worrying that I'll mess up and waste a bunch of ingredients, I'll try adding more flavors. I have my eyes on the little dried shrimp used in many traditional kimchi preparations. Both Sandorkraut and the Tigress stress the generous flexibility of lacto-fermentation, and its long history of being done almost entirely to taste. Archeological evidence suggests that laborers working on the Great Wall of China 2000 years ago were eating fermented cabbage and that it was introduced to Europe by Mongol hordes after the Great Wall wasn't quite great enough. Or, maybe I'll just come up with some other concoction that can only dubiously be called kimchi.

    New England Late Summer Kimchi

    vegan, grain/gluten-free, raw
    makes about 3 qts


  • 5 lbs cabbage, sliced into 1" strips
  • 3 med-large beets, peeled and cut into ¼" sticks

  • The seasoning:
  • 2 Tblsp. Korean chili powder OR 1 Tblsp. each of cayenne pepper and sweet paprika
  • 1 smallish head garlic, minced (about ¼ c.)
  • ¼ c. fresh ginger, peeled and minced
  • 1 Tblsp. sugar
Prep veggies and load into non-reactive containers. Make a 1:16 (6¼%) salt solution and pour over veggies to cover. I mixed it a quart at a time, using ¼ c. salt to 1 qt. water in a lidded container and shaking until the salt dissolved, and ended up using about a gallon. Cover with a plate and weight down to squeeze the vegetables. I used a quart jar filled with water as a weight. Let sit overnight.

The next day (or 8-12 hours later), drain the veggies, reserving at least half of the brine for the fermentation. Dump drained vegetables into a large bowl with room to mix. Prep seasonings and add to bowl. Using gloved hands (don't make me tell you horror stories about chili hands!), massage the spices into the vegetables to get even distribution and good mojo going. Load your proto-pickle into fermentation vessel(s) (e.g. crockpot, glass jar), add reserved brine to cover, and cover with plate/weight as for salting.

Check daily. Fermentation should start to kick in on day 2 or 3, and probably won't take more than 6 days to reach full flavor. Speed of fermentation will depend on temperature and other conditions. When kimchi has reached desired level of doneness, pack into clean jars and refrigerate. Refrigeration will drastically slow fermentation, but it may get a little more sour over several months of storage.

Saturday, August 13, 2011

Shiitake Part 2: Hot Cucumber Salad

As the last post discussed, we returned from Tuesday farmer's market with a pint of fresh, local shiitake mushrooms and were determined to make them shine in simple dishes.

Two days later, a friend of ours showed up for dinner with a flat of fresh veg. from the farm where he's been living. He turns up occasionally with interesting selections of ingredients in search of a good home. Friends like this are good friends to have. This haul included a few pints of different tomato varieties, several colors of summer squash, a half-dozen cucumbers, some mismatched eggplants and a tiny, heart-sized watermelon. While compulsively munching little, orange, crack-laced tomatoes, we described a dish another recent dinner guest had shared with us that we found astonishing: hot cucumber salad. Something she had picked up in her travels in Western China, primarily Gansu province, the dish is hot in both senses of the word: served hot from the wok and liberally dosed with chili and garlic.

Up until then, it hadn't occurred to me to do a cooked dish composed primarily of cucumber; it seemed anathema to the vision of cucumber as cool, crisp crunch. Most of the hot cucumber I'd eaten involved throwing some into a fried rice in its very last moments on the stove, or including it al minuto in a brothy soup. This dish totally sold me on the idea, though. Remembering a languishing, slightly wilted half-head of greenleaf lettuce, we decided to add that, making it somewhat of a hot reimagining of a green salad. Also, it seemed a perfect foil to our plan for the second half of the fresh shiitakes, cooking them with Korean rice cake.

Korean rice cake (dduk) is a little like a giant, glutinous rice noodle (which, despite the name, is gluten-free), which we buy sliced on the bias into rounds. It has a thick, chewy texture and pairs well with all kinds of things. In fact, between that and gochujang, a thick, chili-based condiment that has been near indispensable in Korean cuisine since the introduction of chili in the 18th century, you have a kick-ass base for a stir fry which you can plug almost anything into. But that's a story for another day: gochujang would have overwhelmed the delicate little mushrooms.

Instead, we cooked the rice cake with a little bit of onion, oil and salt over high heat to get a little bit of toasty char flavor (contrary to what some may say, burnt is a flavor; you just probably don't want it to be the dominant flavor of your dish), took it out, cooked the mushroom similarly, and then tossed them together. And we saw that it was good. It's so simple, it's almost redundant to write a formal recipe to follow that.

    Hot Cucumber Salad

    vegan, gluten-free
    Serves 2-3
  • 2 med-large cucumbers, halved, seeded and bias-sliced med. thick
  • 3 cloves garlic, minced
  • 3 whole, dried red chilis, broken loosely
  • OR
  • 1 tsp. red pepper flake
  • 2 tsp. peanut or neutral oil
  • ½-1 tsp. salt

  • Optional:
  • 1 small head leafy lettuce, sliced into 1" strips
  • 1 Tblsp. rice vinegar
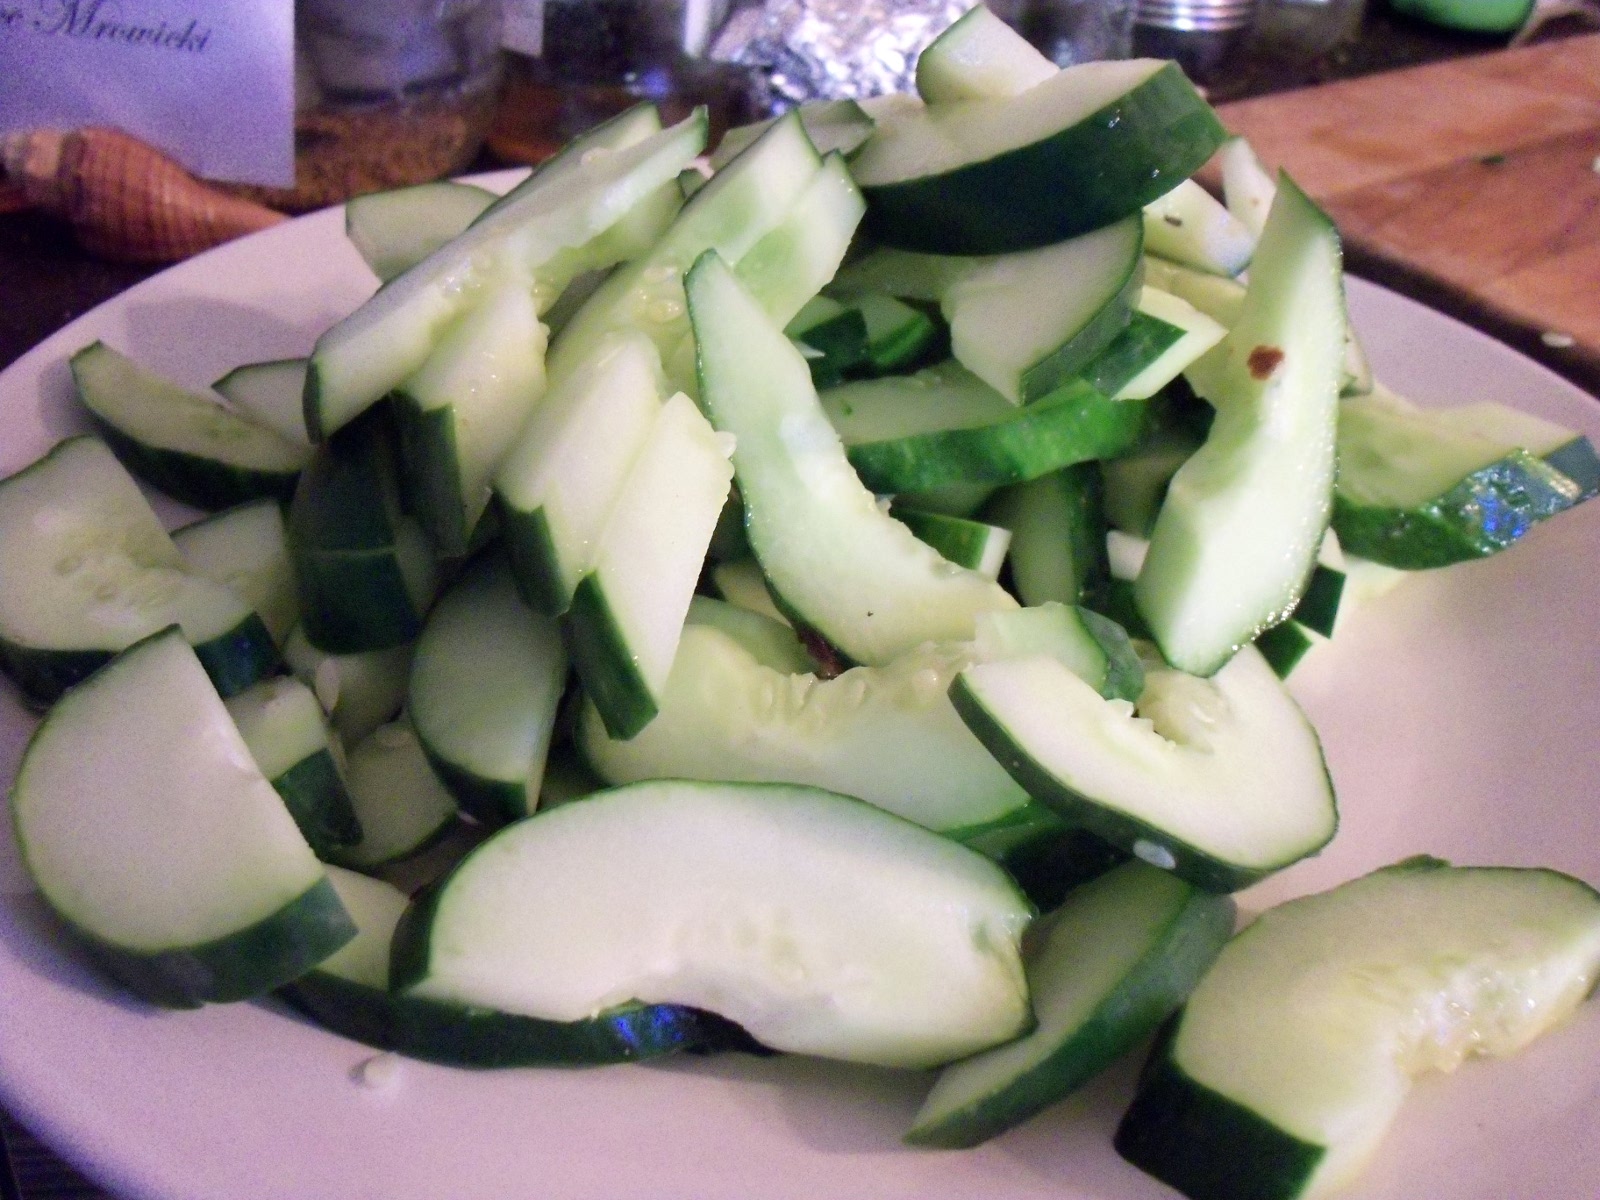
Prep vegetables. Heat wok over high heat. Swirl in oil. Add red pepper and about half the garlic. Tossing until the garlic smells toasty, about 10 seconds. Add cucumbers and toss. Sprinkle with about half the salt. and toss occasionally until cumbers start to get slightly soft, about 2-3 minutes. Add lettuce and vinegar, sprinkle with remaining salt and garlic. Toss to combine and cook until lettuce is somewhat wilted, 1-2 minutes.

    Shiitake & Rice Cake Stir Fry

    Vegan, gluten-free
    Serves 2, unless you've been sitting around eating too many little tomatoes, in which case it may serve 3
  • ~1 lb sliced rice cake (½ the bag)
  • ½ med. sweet white onion, med. dice
  • 4 tsp. peanut or neutral oil
  • 1 tsp salt
  • 1 c. fresh shiitake, sliced
  • ½ c. baby bella/crimini mushrooms, sliced
Heat wok over high heat. Swirl in 2 tsp. of the oil and add half the onion. Toss and add the rice cake. Sprinkle with half the salt. Toss/stir occasonally, letting the rice cake get a few charry speckles and the onion get a little soft, about 5 minutes. Remove to serving bowl.

Swirl in the other 2 tsp, of oil, add mushrooms and remaining onion. Sprinkle with remaining salt. Stir/toss until mushrooms & onions start getting soft, 3-5 minutes. Turn off heat, add rice cake back to wok and toss until combined.

Friday, August 12, 2011

Do You Know the Mushroom Man?

With the farmshare, we don't end up at the local farmer's markets that often. It's always an eye-opener as to how much more than staple veggies is available! When we went this week, among the treasures that followed us home were some pre-Prohibition style ginger ale from Green River Ambrosia, red currant-topped shaved ice (which didn't make it home, let's be honest), and some fresh shiitake mushrooms. These were particularly exciting. I play with dried shiitake all the time, but the fresh deal has a more interesting, subtle flavor and less toothy texture. We got there late enough in the day that it was the only variety the Mushroom Guy had for sale (it's his display above with lobster mushroom, coral mushroom, vampire squid edible bolete, etc.).

We decided we needed to really make the most of the pint of fresh shiitake, and it ended up becoming two very simple East Asian-style meals, leaving very little to get in the way of the fungus.

Day 1: Shiitake Rice Bowl

The other thing that's been a big influence on our cooking this week was the appearance in the mailbox of vol. 1 of Lucky Peach magazine, the inaugural issue of a gonzo gourmet magazine ring-led by Momofuku executor David Chang. The whole issue is nominally dedicated to ramen, and, to be sure, there's enough ramen-related content in there to fuel both a dissertation and a serious noodle-jones. It also takes time to wander off topic long enough to document a shared drunken rant on mediocrity between Chang, Anthony Bourdain and Wylie Dufresne, ruminate on the nature and relevance of authenticity in food, and dedicate the final quarter of the issue just to eggs.

The egg section not only describes several out-there egg recipes, but dedicates several pages just to examining about 12 different stages of boiled egg. This seemed to feed into our collective vision of a simple mushroom dish. Chang let slip that his preferred egg cooking time is 5 min. 10 sec., just enough to set the white and thicken the yolk slightly into a silky, unctuous texture. The dish was as simple as this: fresh shiitake sauteed with a little salt and a soft-boiled egg over rice, topped off with a lightly sweet shoyu broth and slivered scallion. That's all.

And really, that's all it needed.

    Shiitake Rice Bowl

    vegetarian, gluten-free, dairy-free
  • 1 c. fresh shiitake mushroom (or dried shiitake, soaked), sliced
  • 1-2 tsp. neutral oil
  • ½ tsp. salt
  • 2 c. cooked rice
  • 1 scallion, sliced thin according to preference
  • 2 eggs, boiled for 5 min, 10 sec, peeled

  • The broth
  • 3/4 c warm water
  • 1/4 c. soy sauce
  • 1 Tblsp. sugar
Heat wok or other wide pan over high heat. Swirl with oil and add mushrooms. Sprinkle with salt and toss. Cook, stirring/tossing frequently until mushrooms are cooked soft, 3-5 min. Remove from heat.

Divide rice into two bowls and put half the mushrooms on top of each, along with one egg. Pour half the broth over each and top with a healthy pinch of scallion.

LinkWithin

Related Posts Plugin for WordPress, Blogger...