Sunday, July 13, 2014

A Recipe for a Bag?

I don't like getting rid of useful things. It gets to be a problem sometimes: the dark side of being good at coming up with things to do with all the leftover wrapping paper, wine corks and egg cartons that life throws at you is ending up perpetually torn between untenable clutter and unending guilt at getting rid of useful things to the point where you seriously consider pouring one out for the last forlorn wedge of cabbage that you had to chuck after it got weird or the armload full of office paper you recycled that was only printed on one side.

If any of that resonated with you, what I'm about to describe will either be exciting or exacerbate the issue: you know those knit-mesh bags that onions, clementines and other produce are often packaged in? A few minutes of crocheting (even if, like me, you're not much of a crocheter) turns them into awesome, reusable produce bags. You can wash produce right in these bags and then hang the whole thing to dry. They are extremely light and compact but strong and adapt to hold a variety of shapes and quantities.

    Ingredients:

  • one mesh bag (see below for details about different kinds of mesh)
  • ~8 yds strong twine (I use #15 or #18 nylon mason's twine)
  • crochet hook, size H-J

Types of Mesh

There's a couple of different types of mesh that these bags are made of, and each type has its advantages and disadvantages. These are the three main types you will see:
Knitted Mesh
This is easily my favorite, as it's the most flexible and adaptable. However, it also requires the most careful construction; the loops that make up the top of the bag can come undone under stress, so it's important to crochet a few rows down from the edge to avoid this.
Woven Mesh
Harder to come apart than knitted mesh, but much more stiff. Woven mesh will still fold up small, but does not adapt to the shape of its contents as well as knitted mesh or diamond fused mesh.
Fused Mesh
This type completely avoids the problem of things coming apart, since the whole thing is one piece, but it's also more rigid than the other types of mesh. There are two kinds here: square fused mesh and diamond fused mesh. Diamond fused mesh has many of the same properties as knitted mesh, while square fused mesh is much like woven mesh.


Pattern

Note: Click any stitch name to see an instructional video for it. These are videos I found already on YouTube, rather than ones I made.
  • Double Crochet three or four rows down from each opening in the top row.
  • Join with a slip stitch when you get all the way around.
  • On the next round, chain two stitches, and do a single crochet into every other stitch all the way around. That's (ch 2, sc) all around for those of you who speak crochet.
  • Join with a slip stitch again, then cut your twine, draw through the loop and weave in the end.
  • Next, add a drawstring. Cut a piece of twine about two feet long and thread it through the gaps made by the skipped stitches.

Update (9/6/14): due to a single quotation mark out of place in my coding, the juicy part of step 3 was not visible until now. Apologies to anyone confused.

Hooray, it's a bag!

Tuesday, July 8, 2014

Peanut Noodles with Spring Greens. And an Egg.

For what it's worth, I wasn't complaining about the cold in February. Complaining about the dark, maybe. I save my temperature complaining for when it's hot out. It pairs well with my cantankerous stubbornness about air conditioning. Today peaked at 95°. Certainly not as hot as it can get around here, but just as certainly beyond comfortable.

Regardless of how warm it was today, here or where you were, we all have those days where the mere thought of turning on the stove makes you want to get another icy drink out. I've been realizing how much peanut sauce is a hot-weather staple for me recently: Fresh summer rolls dipped in it, drizzled over lettuce-wrapped rice (with or without anything else), or even just a bowl of veggies and a jar of peanut sauce.

This has been the recipe I've come back to more than others recently. Here, the peanut sauce dresses up cold buckwheat noodles tossed with long, thin cut cucumber or summer squash (inspired by zucchini noodles) and the piquant blend of greens I've been gradually thinning out of my garden. And ,just for good measure, an egg on top. Since discovering steam-cooked hard boiled eggs (a method which I can't recommend heartily enough), I've been putting them in all kinds of things. I'll let The Food Lab go into detail about the method, but by way of my recommendation, it is faster than other boil methods (since you only have to wait for ½" of water to come to a boil), and I have had an almost perfect peel record with it. The closest thing to an imperfect peel I've had since starting to use it is actually in the photos of this dish, and I'm pretty sure that one was my fault.

It's pretty good without the egg, too, though, and is totally vegan without it. If you're not eating eggs for whatever reason, the peanut sauce does provide a little protein, but I've also made and enjoyed this with crispy-fried bits of tempeh.

Peanut Noodles with Spring Greens

2 servings
  • 100 g soba noodles (one bunch)
  • 1 cucumber or small summer squash/zucchini
  • ¼ c. peanut sauce (see below)
  • 2-3 c. mixed baby greens (1-2 good handfuls per serving)
  • 2 eggs, boiled (or steamed!) to your preference (I like about 8 minutes here)
  • optional but nice:
    • scallion, sliced thin
    • a few sprigs of cilantro


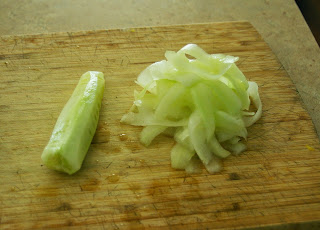
Start by putting on water to boil the noodles and cook the eggs (if you've got time, you can use the same pot and do the eggs after the noodles). While the water is heating up, peel your cucumber or squash. They're both very tasty here, and bulk out the noodles with cool fresh flavor. If you've got a spiral slicer or julienne peeler, good for you. You know what to do, so go to town. Otherwise, use your vegetable peeler to peel thin slices off of the cucumber or squash until you get down to the seeds. If you prefer, you can slice these strips thinner to blend in with the noodles more.

Once the noodles are cooked, make sure to run cool water through them until chilled. Toss the noodles and cucumber/squash in the sauce until well coated. Divide up into bowls and toss with a handful of greens, then top with an egg.


Peanut Sauce

vegan, gluten-free depending on your soy sauce
makes about 1 cup of sauce
  • ¼ c. peanut butter (Mine is creamy, natural & salted. Yours will work too, but you might have to add more or less stuff)
  • 1-2 Tblsp. sugar
  • 1 clove garlic, minced
  • 1 tsp. minced fresh ginger
  • ½-1 tsp. thick chili-garlic sauce like Sriracha or sambal oelek
  • (or more, to taste)
  • 2 Tblsp. soy sauce
  • ¼- c. water
Add all ingredients except water. Add water a tablespoon or so at a time, stirring until thoroughly combined before adding more water. If you add too much water at once, the suspension will break and you'll get weird thready peanut-butter bits in seasoned water. If this happens, add a little more peanut butter and stir until smooth. You'll have to add more water later. Adjust seasoning as necessary.

Friday, May 23, 2014

Don't Step on the Grass...

But no, not that grass in the lawn. And, no, not that either.

You may know it as asparagus, but come mid-May around here, it's simply grass. Hadley grass, to be specific. Hadley, on the rich floodplains just across the Connecticut River and hair north of here, is world-renowned for its asparagus. Or at least it was, up until the 1970s, when a soil-borne fungus more than literally decimated Hadley's asparagus production. In the decades leading up to that, Hadley farmers would pick and prepare up to 50 tons of asparagus each day of the fleetingly brief few weeks of the season. Hadley grass reportedly turned up in chic European restaurants and even at springtime feasts held by the Queen of England.

Although local asparagus production doesn't take on the epic proportions it did forty years ago, there are still a handful of asparagus farmers in full-scale production and many backyard growers with extra to sell. The town still takes pride in this element of its history, honoring the tender green spears with a major community festival and, I kid you not, an ice cream flavor. And, as it's an ingredient where freshness is especially rewarded, it's still worth trawling the back roads in Hadley and the surrounding towns this time of year for hand-written signs that simply read "Grass." Or, if you're me, quietly coveting the asparagus in the adjacent community garden plot and settling for taking many pictures of it and then buying a bunch from the stand just up the hill.

So, why simply grass? One variant, based on a folk etymology of the word, dating back to the 17th century, was sparrowgrass. The name held on until late in the 1800s, and, according to a 1791 pronunciation dictionary, calling it "asparagus" implied "an air of stiffness and pedantry." I can't say for certain why it stuck around here, but even aside from a desire to avoid stiffness and pedantry, it was grown in sufficient volume that it was almost as common as that grass in the lawn.

Asparagus being as versatile as it is and asparagus season being as fleeting as it is, I've been chowing through it every which way since the first local asparagus came in about two weeks ago. I was thinking of writing about asparagus and chèvre risotto or lemony shaved asparagus salad, but today's cool, rainy weather put me in a soup mood so I put together a creamy, smooth asparagus soup, accented with dried shiitake mushroom and white wine and topped with the asparagus tips, toasted with slivered garlic.

Creamy Asparagus-Mushroom Soup

gluten/grain-free, optionally vegetarian
  • 1 lb. asparagus
  • 1 onion, small dice
  • 4 cloves garlic
  • 6-8 dried shiitake mushrooms
  • 1 Tablespoon butter
  • 1 teaspoon olive oil
  • 2 teaspoons salt
  • 1¼ c. dry white wine
  • ½ c. cream
  • 2 c. chicken or veggie broth
You have two options with the dried shiitakes: you can grind them up and add them as a powder, or you can simmer them in the stock until they're soft enough to blend. If you're simmering them in stock, start that first. Break up the mushrooms coarsely with your hands and put them in a small saucepan with the broth and bring up to heat over medium-high heat. The mushrooms will need to simmer for at least 15-20 minutes to soften. If grinding them up, run them through a spice grinder until fine and set aside.

Dice onion. Melt butter with olive oil in a large saucepan over medium-low heat, then add onion, stirring occasionally. Meanwhile, peel and mince two cloves of garlic and prep the asparagus. Snap off both ends of the asparagus (this is a good job for earnest helpers of all ages and abilities). If you're running short on time, you can cut off the top and bottom inch of the spears in one fell swoop. Scrap the cut ends, but put the tips aside to put on top later. Cut the stalks into pieces about an inch long.

Once the onion has started to get clear and soft, add the garlic, salt and asparagus. Stir until the garlic gets fragrant, then add a cup of wine. If simmering mushrooms, add the mushrooms and broth, too. If using ground mushrooms, whisk with the stock and add to the pot with the asparagus. Let simmer until the asparagus is soft, 10-15 minutes, add the cream and remaining wine, then blend until smooth.

Sliver the other two cloves of garlic and saute in a little olive oil with the asparagus tips and salt and pepper. Serve soup with garlicky asparagus tips on top.

Sunday, April 13, 2014

Tortilla Soup: Great Sick Food or Greatest Sick Food?

In 2000, Dr. Stephen Rennard of the University of Nebraska set out to design a study to examine if and how chicken soup might actually help people suffering from the common cold. In the study he started with his wife's recipe, handed down from her Lithuanian grandmother. Results from Rennard's study suggested that chicken soup may actually help fight colds by inhibiting the movement of a particular type of white blood cell that defends against infection. Rennard's team (and other scientists who have replicated the study since then) found similar results with other chicken soup recipes as well, though they couldn't identify which ingredients were key to the soup's immuno-supportive qualities. You can see Dr. Rennard's article, Grandma's recipe and some adorable pictures of him and his wife cooking soup together at the University of Nebraska Med. Center website.

When I ended up with a cold a couple weeks ago, I had very little energy, a fridge full of forlorn, half-eaten rotisserie chickens, and a craving for spicy food. There are always a few roast chickens languishing in the fridge; most weeks, Tom takes full advantage of the Friday two for $10 deal on them at the local supermarket, eats the breast (at least most of it) and then leaves them in the fridge. I'm not too big into plain roast chicken, but I hate letting something like that go to waste (my generalized guilt about wasting food is multiplied when an animal died to become that food), so I am constantly trying to find ways to sneak this leftover chicken into things. In this case, spicy chicken soup provided the answer to all of these queries.

I used tortilla soup, a chile-spiked, chicken-based soup with origins across Mexico, as a jumping off point. I spent a while curled under a blanket with a box of tissues and the laptop reading many recipes for inspiration. This recipe might take a little while, but it's one where there's not a whole lot of active time, which means there's time to stop and take a nap between steps. You may not have all of the ingredients that I did (nor the plague of half-eaten chickens) so for many of the ingredients here, I provide a few alternatives.

In the end, what I came up with was good enough to eat for several more days without getting bored and to make again even when I wasn't sick.

Chile Chicken Soup

gluten-free, dairy-free, optionally grain-free

    Ingredients:

  • 2 half-eaten rotisserie chickens (You can use 1-2 lbs of fresh/frozen chicken and simmer in 2-3 qts of chicken stock instead of water)
  • water to cover (3-4 qts)
  • 2 tsp. light-flavored oil
  • 2 small-medium onions
  • 8 cloves garlic
  • 6 Dried Anaheim chiles, toasted* (or about ¼c. paprika, see note about chiles)
  • 2 chipotle chile (or 1-2 tsp. chipotle powder, scaled to taste, or ½-1 tsp. cayenne)
  • 2 tsp. ground cumin
  • 2-3 bell peppers, fire-roasted (I used a combo of red bell and cubanelle)
  • 1/2 can crushed tomatoes
  • salt to taste
  • handful cilantro
  • 2 T masa harina made into a slurry with about 1/4 cup water, stirred in close to the end (optional, adds body)
*About Chiles I used California Anaheim and chipotle peppers. California Anaheims are milder than the already fairly mild New Mexico Anaheims. I buy them in a big bag as "California Chiles" at my local international market. They add a lot of rich chile flavor with virtually no heat. That's (part of) what the chipotles are there for. Chipotles are smoke-dried jalapeño peppers and add both heat and a rich, smoky flavor. I'd actually prefer to use a blend of these with dried pasilla chiles (also called chile negro), which are somewhat spicy and have a slightly darker flavor, but I didn't have any on hand. Anchos (dried poblanos) would also be good here. Additionally, you can replace these with about ¼ cup sweet paprika and about ½ tsp. of cayenne.

    Topping suggestions:

  • tortilla chips (if you want to be fancy, fry your own tortilla strips)
  • avocado
  • lime
  • more cilantro
  • sour cream
  • shredded jack, cheddar or queso blanco cheese
  • chili sauce

Before we get started, let me introduce you to my spice grinder. This is one of my best friends in the kitchen. It's not that I'm a fresh-ground spice purist (I'm not), it just allows for so many more options: getting to make chili powder out of whichever dried peppers I like, pulverizing the dried shiitake mushrooms I like sneaking in all over the place, not having to buy both whole and ground versions of spices I use in both forms. Yes, it does say über super coffee grinder on the side. You can buy devices labeled "spice grinders" but many comparisons I've seen say you're better off with a small, blade-driver electric coffee grinder unless you are regularly grinding very large quantities. Additionally, little coffee grinders are cheap. You can reliably buy them new for under $20, commonly find them at thrift stores or tag sales for <$5, and sometimes find them for free at the dump swap shop, if you are lucky enough to have such a thing, or from someone who is moving, giving up coffee, or getting rid of it for some other reason. I used to have two, one for coffee and one for spices, but the one which had served as spice grinder for nearly a decade gave up the ghost this winter, so the coffee grinder got promoted.

On to soup, though. If you're using leftover roasted chicken(s), break apart chicken carcasses just enough so they fit in stockpot well. Leave any remaining meat intact. Add any languishing veggies (got half an onion? some sad, floppy carrots? half a shriveled beet? throw them in!). Add water to cover, simmer for 1 hour, let sit for 1 hour, then pick the meat off of the bones (it will fall off). I find that with 4 quarts of water, I end up with about 2½ quarts of stock with the evaporation that happens. Sometimes I cook the stock down a little further. If you are using fresh meat, pour about 2 qts of stock over 1-2 lbs chicken and simmer for about an hour and sit for about an hour. Either way, strain the chicken over a bowl shred the meat with your fingers or with two forks if it's too hot to handle. Add the chicken to the reserved stock or the other way around, whichever fits better, to use the stockpot to get the next part ready.

Next, roast the sweet peppers. If you have a gas range, you can put the peppers right on the burner grate over a medium flame and turn every minute or so until the outside is blistered, peeling a little, and has some lovely blackening on the skin all around. Then, place them in a covered dish so they can finish steaming from within. If you have an electric range, you can check out some of the suggestions offered here. You can also elect to simply chop up your peppers and cook them with the onions and garlic, but roasting them brings out their sweetness and adds the depth that only light charring can bring.

Dice the onions, slice the garlic, cook in light-flavored oil in stock pot over med-low heat, stirring frequently until well-browned and tasty smelling. Add non-chile spices to onion/garlic and stir until fragrant. Take a handful of cilantro, cut (but keep!) the stems. Finely chop the stems and roughly chop the leaves, then add to the onions, garlic and spices, then return chicken + broth to pot.

If using whole chiles, toast them over the stove as well. Either grab them with tongs one at a time and wave them over the flame until they get fragrant and a little puffed or toss them in a dry cast-iron skillet over medium-low heat until a similar effect is achieved. Tear them up, remove the stems and grind. I can only fit one or two in my grinder at a time, so it takes a few batches. I just dump them right into the pot as they come out.

Take stems & seeds out of the sweet peppers, if you didn't add them with the onions and garlic. Either chop them finely or run them through food processor. Add chopped peppers and crushed tomato to soup. A nice, but not essential touch here is to take a few tablespoons of masa harina (the specially-treated corn flour used for making tortillas), mix with some water and add the the soup. It gives the soup a hearty, satiny body, but it's not worth buying masa harina just for this. The soup will be plenty tasty without.

Adjust the seasoning. I usually serve with some assortment of tortilla chips, fresh cilantro, avocado cubes (don't skip these!) and lime wedges. Other people reportedly like adding sour cream or shredded mild cheese. Regardless, let diners add their own flair. As much as the tortilla bits give the soup its name, it's pretty good without them, too, if you don't have them or aren't eating corn for whatever reason. I also like to put out some chili sauce, so that diners can adjust the spiciness to their liking.

Monday, July 8, 2013

Jamaica Jerk Cooler: Hibiscus, Watermelon & Heat!

In Spanish, the hibiscus flower is commonly known as flor de Jamaica or rosa de Jamaica (sometimes just jamaica) but a somewhat less common name for it is rosa de Abisinia. It's interesting that two names for the same plant would reference two different places, especially places that are connected in other ways. Abisinia, rendered in English as Abyssinia, is an older name for the territory that is now Ethiopia. There are several cultural connections between this part of Africa and Jamaica, but none so significant as Rastafarianism, the Jamaican-based, Ethiopian-focused religion. While most people's first associations with Rastafarianism involve dreadlocks and weed, the underlying theology of the faith is rooted in a belief in a deep connection between Jamaica and Ethiopia. Drawing heavily from the biblical stories of the Jewish exodus from slavery, Rastafarians seek to eschew the trappings of "Babylon" (interpreted as the forces of modern imperialism) and see Ethiopia as the homeland to which they will return, and Haile Selassie (Ras Tafari), Emperor of Ethiopia from 1930-1974, as a messianic figure. I don't know how old the Spanish names for hibiscus are, but they almost certainly predate the beginnings of Rastafarianism in the 1930s, which makes the connection all the more interesting.

Interesting connections aside, hibiscus tea makes a fabulous summer drink, crisply tart and refreshing with a striking ruby hue. Known in Spanish as agua de jamaica, it is one of several classic aguas frescas with roots in Mexico. Lightly sweet coolers that go a ways toward quenching both thirst and heat, other common aguas frescas include sweet, tangy tamarindo (tamarind), creamy horchata (a sweet rice milk with cinnamon), and smooth sandía (watermelon).

So with all this talk of Jamaica, Ethiopia and Mexico, on to July 4th. This July 4th was a blast. We took a little road trip to Cambridge for my friend Meaghan's South Pacific tiki-themed party, complete with pig on a spit (here's Neko in position under the serving table, watching the ground hopefully). Although, interestingly, it was hotter in Cambridge than in Honolulu that day, by about 10°. Meaghan, whom I play music with, is one of two the proprietresses of Booze Époque, a Cambridge-based mobile cocktail magic outfit (always a good friend to have). Meaghan and her BÉ collaborator, Harmony, created a number of delicious concoctions for the party (with and without booze), they also held a tiki drink contest. Contestants concocted their own summery drink with the requirement that it include at least one local ingredient. Among a number of interesting and tasty entries, I am honored to say my Jamaica Jerk Cooler ended up taking the grand prize Cthulhu-on-vacation tiki sculpture.

As I've said before, my family's recipe secret is that we don't keep secrets about recipes, so here's how you make it. The drink takes advantage of good lessons learned from aguas frescas, combining hibiscus and watermelon juice with a syrup made with honey and steeped with spices you might find in a jerk marinade - allspice, cinnamon and chipotle pepper (in most jerk spice mixes, this would be Scotch Bonnet peppers, but I wanted the smokiness of the chipotle here). It is also good with a little gin in it, but it's delicious without as well.

Jamaica Jerk Cooler

    Makes about 3 quarts
  • 1 ½ c. dried hibiscus flowers
  • 2 qts water
  • 1 qt watermelon juice (I'll go into more detail below about how much watermelon you need for this much juice)
  • 2 c. honey jerk syrup, below
  • lime wedges
  • gin (1 oz. per serving or about 1½ c. for whole recipe)

  • Honey Jerk Syrup
  • 3-4 whole chipotle peppers, not in sauce
  • 2 Tblsp. whole allspice
  • 4 cinnamon sticks
  • 1 c. water
  • 1 c. honey
Start with the syrup: bring the water and spices up to a boil in a small saucepan, turn heat down to a simmer for about 5 minutes, then turn off heat and allow to steep for at least an hour. Strain out spices, then return liquid to saucepan. Add honey and warm until the honey combines totally with the spicy liquid. Set aside/chill. I had a little trouble finding whole chipotles (smoke-dried jalapeños) outside of adobo. Apparently, my local coop only has chipotle powder now.

Next, make the hibiscus tea. Put 1 quart of water and the dried hibiscus into a saucepan. Bring to a boil, then turn off heat and let steep for about an hour. Strain and add the remaining quart of water.

As far as the watermelon juice, I started with a melon weighing about 10 lbs and ended up with about 10 cups of juice: what you see at right, plus another quart. I'm enjoying having the extra watermelon juice around (see below), but you probably only need about 6 cups of cut up watermelon to get a quart of juice. To juice the watermelon, cut it off the rind and put it in a blender or food processor. Blend for a few minutes, until there are no visible chunks. Pour through a fine mesh sieve and press through with a spatula or spoon. True to its name, watermelon is primarily water, and what you see in the mason jar at right is all the pulp left from the entire 10 pound watermelon. There's about a cup of it, relative to the 10 cups of juice, and it's great to eat chilled, with a spoon when it's really hot out.

If you plan to make this punch alcoholic, add about 1½ cups of gin to the total (or to taste). You can also mix it by the serving, adding about 1 oz. of gin to 8 oz. of punch. With or without alcohol, serve each cup with one or more lime wedges.

On using up the Watermelon

Making watermelon juice is a great way of reclaiming the fridge space taken by a languishing piece of melon. I've been having fun playing with watermelon juice this summer. It's a great base for all kinds of drinks. One of my favorite cool down drinks right now is a cup of watermelon juice, half a lime and a can (12 oz.) of seltzer. It pairs really well with citrus, mint, and many other fruits.

Additionally, for extra points in not wasting ingredients, here's my recipe for watermelon rind pickles.

Thursday, May 9, 2013

Curried Tempeh with Mustard Greens and Cellophane Noodles

I'll be perfectly honest: I didn't like tempeh as a kid.

In fact, early experiences with tempeh meant that I didn't give it much of a chance again until about a year ago, but, boy howdy, am I making up for lost time.

Tempeh is a protein-rich food made from split soybeans and, sometimes, a variety of grains which have been parcooked and innoculated with Rhizopus oligosporus, a type of fungus, and incubated for 24-48 hours. The culture partially ferments the legumes/grains, making them easier to digest, and binds them together into a firm cake with a mild flavor somewhere between nuts and mushrooms. It can be sliced or crumbled and holds up to grilling or stir-frying. Most tempeh is gluten-free, but, if you're concerned about that kind of thing, it's important to read the labels on multigrain tempehs, which vary in contents, but sometimes include gluten-bearing barley or rye.
In its native Indonesia, it's very often served fried or grilled, often with some kind of lightly sweet & spicy accompaniment. Peanuts turn up with it a lot too. For me, I've found that I still don't fancy the taste of plain tempeh - despite liking nuts, mushrooms and tempeh - but that sauteéing it until it's a little crispy with some salt or soy sauce makes a world of difference.

Recently, I've been cooking it up in a spicy-sweet stir-fry with mustard greens, largely inspired by this South Indian take on tempeh from Delectible Victuals, with the addition of a generous helping of fresh cilantro, including the stems. It's good over rice, but it's great tossed with thin cellophane noodles, made from mung beans and also gluten free (available at Asian markets - rice vermicelli is a good, slightly more common replacement and any other thin, clear noodle would work). If you want to serve with rice or bread, you can simply omit the steps in the recipe below involving the noodles. It's also at least as good cold the next day.

Curried Tempeh with Mustard Greens and Cellophane Noodles

vegan, gluten-free (depending on tempeh, soy-sauce)
Ready in about 30 minutes, serves 2-3
  • 1 small-medium onion, small dice
  • 2-3 cloves garlic, minced
  • ½ red bell pepper, medium dice
  • 1-2 tsp. light-flavored oil
  • 1 tsp. ground turmeric
  • handful cilantro
  • soy sauce
  • 1 Tblsp. sugar
  • 1 8-oz. package tempeh, crumbled
  • thick chili sauce, like sambal oelek or sriracha, to taste (start with 1-2 tsp.)
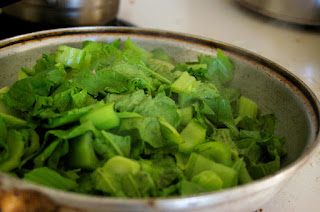
  • 1 good sized bunch mustard greens or other medium-weight green like swiss chard, sliced into 1" ribbons
  • about 4 oz. dried cellophane noodles - in the packages I get, this is two bundles
  • crushed peanuts (optional)
Start by putting the noodles in a bowl of warm water to soak, which is all the precooking they need. They will need to soak at least 15 minutes. Prep the veggies and crumble tempeh coarsely. Cut off the bottom half of the cilantro stalks. Set aside the leafy end for later and mince the stem end very small.

Heat a large wok or skillet over a high heat. Add a teaspoon or two of oil and swirl to coat. Add tempeh and a teaspoon or two of soy sauce. Cook until tempeh becomes browned and a little crispy. Set aside and try not to pick at it too much. Wilt the greens slightly in a separate pan with a tight fitting lid by putting on medium-low heat with a tiny bit of water in the bottom. The greens will reduce in volume by at least half.

Add a little more oil to the wok or skillet and add the onions, garlic, bell pepper and minced cilantro stem. Saute until the peppers and onions get a little color, then add the turmeric and sugar. Add the tempeh and chili sauce. Drain the noodles, then add the wilted greens and noodles to the wok or skillet. Toss to combine. Remove from heat and toss with roughly chopped cilantro leaves. Adjust soy sauce, chili and sweet levels as desired. Serve with optional crushed peanuts on top.

Tuesday, March 12, 2013

Pi Day: The Snozzberries Taste Like Snozzberries!

by the amazing Ryan North

I don't love π Day just because I teach math. I mean, that helps, offering an opportunity to highlight and celebrate the playfulness that math can offer, but there's also some degree to which celebrating a transcendental number such as π is an interesting examination of our quest for knowledge. Humans have been aware of π, the constant ratio of a circle's circumference to its diameter, for about 4000 years, since the time of the Ancient Babylonians (who approximated π at 3.125). Since then, a remarkable amount of time and energy has gone into extending and refining how accurately we can describe π, even though the most common approximations — 3.14 and 22/7 — haven't changed in nearly 2500 years, since at least the time of Archimedes, in the 3rd century BCE and even though we've understood that it's irrational and won't end since 1761. There's a somewhat apocryphal claim that it would only take 40 digits of π to measure the circumference of the known universe with a minute margin of error. Regardless of the veracity of that, it does highlight the degree to which the vast majority of the calculated digits of π, patternless, endless and infinitesimally small, are unnecessary for any practical purpose. And yet, we keep calculating further. There is a certain poetry in seeking knowledge purely for its own sake; this is another piece of what we're really celebrating by celebrating π Day.

Also, it's a good excuse for pie: pie and scores of terrible, terrible puns.

I make two pies each π day, because two pie are enough to go around (I warned you about the terrible puns). I like to try a new pie every year for π Day, usually a somewhat fanciful one that I invent, if only so that it's unique among pies. Last year, I decided it was time to take on Snozzberry Pie. Unfortunately, snozzberries aren't in season this time of year (or any other), so what to do in their absence? Examining the answer to that question has much in common with humanity's quest for pi: fundamentally unanswerable, but bears eternal examination, revealing more and subtler nuance over time. Alternately, you can just go with whatever fruit looks good and on sale. The below pie got rave reviews from tastebuds young and old last year. The taste blends into something not entirely placeable, yet pleasantly fruity with a surprise twist, and the filling has just enough starch to hold a soft gel.

Excuse the terrible photo quality.

Snozzberry Pi(e)

  • 2 pie crusts (for top & bottom, your own recipe or the one below)
  • for filling:
  • 1 c. formerly frozen raspberries (they'll be pretty mushy)
  • 1 c. fresh blueberries
  • 4 kiwis, quartered, peeled and sliced
  • zest and juice of one lemon
  • ½ c sugar
  • ¼ c. flour
  • ¼ c. cornstarch
  • pinch cayenne (good snozzberries have a little piquancy to them)

Preheat oven to 350 degrees. Mix all filling ingredients in a small bowl. Roll out one pie crust and lay in pie pan. Pour filling in, cover with other crust and crimp edges. Bake for 50-60 minutes or until crust is browned and filling is bubbly.

Pie crust

makes 1 pie crust (you'll need 2 for the recipe above)
  • 1 stick cold butter
  • 1 cup flour
  • ½ tsp salt
  • no more than ¼ c. cold water

You can use whatever crust recipe you like for this pie, but this is the recipe that stays in my head, so it's the one I use.

The food processor helped me conquer my timidity of pie crust as it helps avoid getting the butter too warm, working the flour too much and developing the gluten, or taking forever. Cut each stick of butter into 10-20 pieces of roughly equal size. Put that and the flour in the food processor and pulse until the butter is a somewhat gravelly texture. Pour water in a thin stream while on until the dough starts to come together. Dump out onto waxed paper. Gather and squeeze into a ball, then flatten into a rough disk and wrap in its own piece of waxed paper. Refrigerate for at least an hour.

When making more than one crust, you should wrap and chill each individually. I like to do each in a separate batch to keep the amount consistent. If using a food processor, it's not necessary to wash the bowl between each crust. If you're doing multiple crusts old school with a pastry cutter, you may want to cut all the butter into all the flour at once, but I'd still recommend mixing each crust with water individually. After cutting the butter into the flour and salt, take 1½ c. of that mixture and trickle in the water while bringing the dough together with a spoon or your hands. Wrap and and chill individually as for food processor directions.

Saturday, January 19, 2013

Aloo Mattar Deconstructed (Or, one more thing to do with mashed potatoes)

I'm always interested to hear from people if they have, historically, been food separators or food mushers. Food separators are those who observe strict boundary lines between food on their plate; they may go so far as to reject those impure motes of food which may have absorbed traces of the others. Food mushers, on the other hand, tend to take a more integrative, Gestalt approach, seeing divisions between the food on your plate as totally constructed and unnecessary, swirling it all into a cohesive whole.

Kids tend to be much more hardline about their separation/mushing practice, though it is certainly not limited to young folks. Interestingly, despite any value judgment I may have implied in my descriptions, I know great cooks who grew up in each camp. It truly is interesting to see how it's an indicator of one's approach: Separators tend to take a more measured, scientific approach. They're more likely to do careful research before cooking, even if they're creating a new recipe. You want one in your kitchen the day you get that perfect first bunch of asparagus in the spring. Mushers tend to play a little more fast and loose in their recipe creation, coming up with uncanny combinations on the fly and making the most of what's at hand and reimagining ingredients. You want one in your kitchen when you have a fridge full of leftovers that need to get used up.

That said, this one goes out particularly to those other folks who ever got excited about swirling together mashed potatoes, peas and ketchup. Doubly for anyone who would add hot sauce.

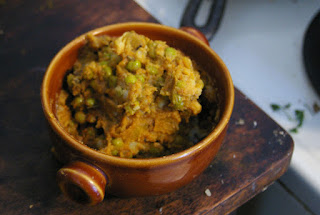
Aloo Mattar is a hearty North Indian dish featuring potatoes (aloo) and peas (mattar) in a spicy, tomato-based sauce. I first made this on a cold, damp day I really wanted mashed potatoes, much more than I wanted rice or flatbread, so I pulled the recipe apart so as to put the curried peas over the potatoes. Since then, I've used the curry over mashed potatoes idea in a few other ways, but this is still my favorite. It also leaves broader possibilities for using the leftover mashed potatoes.
The dish comes together quickly (I've done it in less than 30 minutes), is vegetarian, and could easily be vegan: make whatever mashed potato recipe you like, and omit or replace the (sour) cream. You can even make your own: one of my vegan friends swears by this recipe for cashew sour cream.

Aloo Mattar, Deconstructed

vegetarian, gluten/grain-free, easily veganified
serves 4, start to finish in 30 minutes.

    Super-Basic Mashed Potatoes

  • 5 med.-large potatoes
  • 1-2 tsp. salt
  • 2 T. butter
  • 1/4 c. milk

    Masala Mattar

  • 6-7 cloves garlic, finely minced
  • 1" piece ginger, peeled and finely minced
  • 2 c. tomato puree (about ⅔ of a 28 oz. can)
  • 1 tsp. red pepper flakes
  • 1 med. onion, med. dice
  • ½ T. butter
  • ½ T. oil
  • 1 2" cinnamon stick (if you don't have it, add another tsp. of ground cinnamon later)
  • 2-3 cloves
  • 2-3 green cardamom pods
  • 1 tsp. cumin seeds
  • ½ tsp. methi (fenugreek) seeds (optional)
  • 2 tsp. turmeric
  • 1 tsp. salt
  • 1 tsp. cinnamon
  • 1 lb. (3½-4 c.) frozen peas
  • ¼-½ c. light cream or sour cream
  • fresh cilantro

  • Start with the mashed potatoes. You can use whatever mashed potato recipe you like, but this is a good basic one. It's just a base, anyway. Wash potatoes and slice into chunks about ½ to 1 inch large (you can peel them, if you prefer). Place in a large saucepan, cover with water and add about a tsp. of salt. Cover with a well-fit lid and bring to boil over high heat. Let boil until potatoes are fork-tender, then add butter, milk and salt to taste as you mash. I don't like mine perfectly smooth, and find that having some intact pieces of potato helps back this as an interpretation of aloo mattar, but it's up to you.

    I made the whole peas thing in my cast iron dutch oven, but this would also work in a large, heavy-bottomed saucepan.

    First, prep the garlic and ginger. You have two options here: you can chop them roughly, then throw them in the food processor with the tomato and red pepper or you can mince them both finely and add them at the same time as the tomato.
    Put your large, heavy-bottomed pan over a med-high heat and start toasting the whole spices: the cinnamon stick, cloves and cardamom. let them get fragrant but don't let them burn. Add the butter/oil, cumin and methi (if using) and stir/toast until the cumin seeds get sizzly and fragrant. Add the onion and let it cook for 2-4 minutes until it starts to soften. Add the turmeric, ground cinnamon, peas and tomato/garlic/ginger/chili mixture. Let simmer for 5-10 minutes, then add cream or sour cream and cilantro. Adjust salt/spicy to taste and serve over mashed potatoes.

Thursday, December 27, 2012

A Breakfast Worthy of Birthday

A Breakfast Worthy of Birthday

My ideal birthday is very low key; nobody wants an energetic extravaganza between Christmas and New Year's. The weather gave me a great gift in the first real snow of the season. My gift to myself was this big, elaborately sloppy plate of huevos rancheros that forces you to abandon silverware and eat it with your hands.

If you want to play along at home, here's a breakdown:
  • Pan toasted flour tortilla (little olive oil in the pan on top of whatever flavor was left from the onions)
  • Sweet onion, sauteed with magical spice blend
  • Black beans with chipotle powder and garlic
  • 2 eggs cooked sunny side up with cheddar cheese on top (cooked with cover on), sprinkled with salt, pepper, and hot, smoked paprika
  • medium salsa
  • sour cream
  • mixed greens
  • half a perfectly ripe avocado, sprinkled with salt
Bonus birthday gift from my cast iron skillet: being able to cook onions, tortilla and eggs in it successively without having to clean it before (or after!) any step.

LinkWithin

Related Posts Plugin for WordPress, Blogger...